Planning a baby shower? Sweet treats are a must! Here are 25 easy dessert ideas that will delight your guests and add a touch of fun to the celebration. From simple cupcakes to creative snacks, these dessert options will make your event unforgettable without any fuss.
Vanilla Pudding Parfaits in Baby Bottles
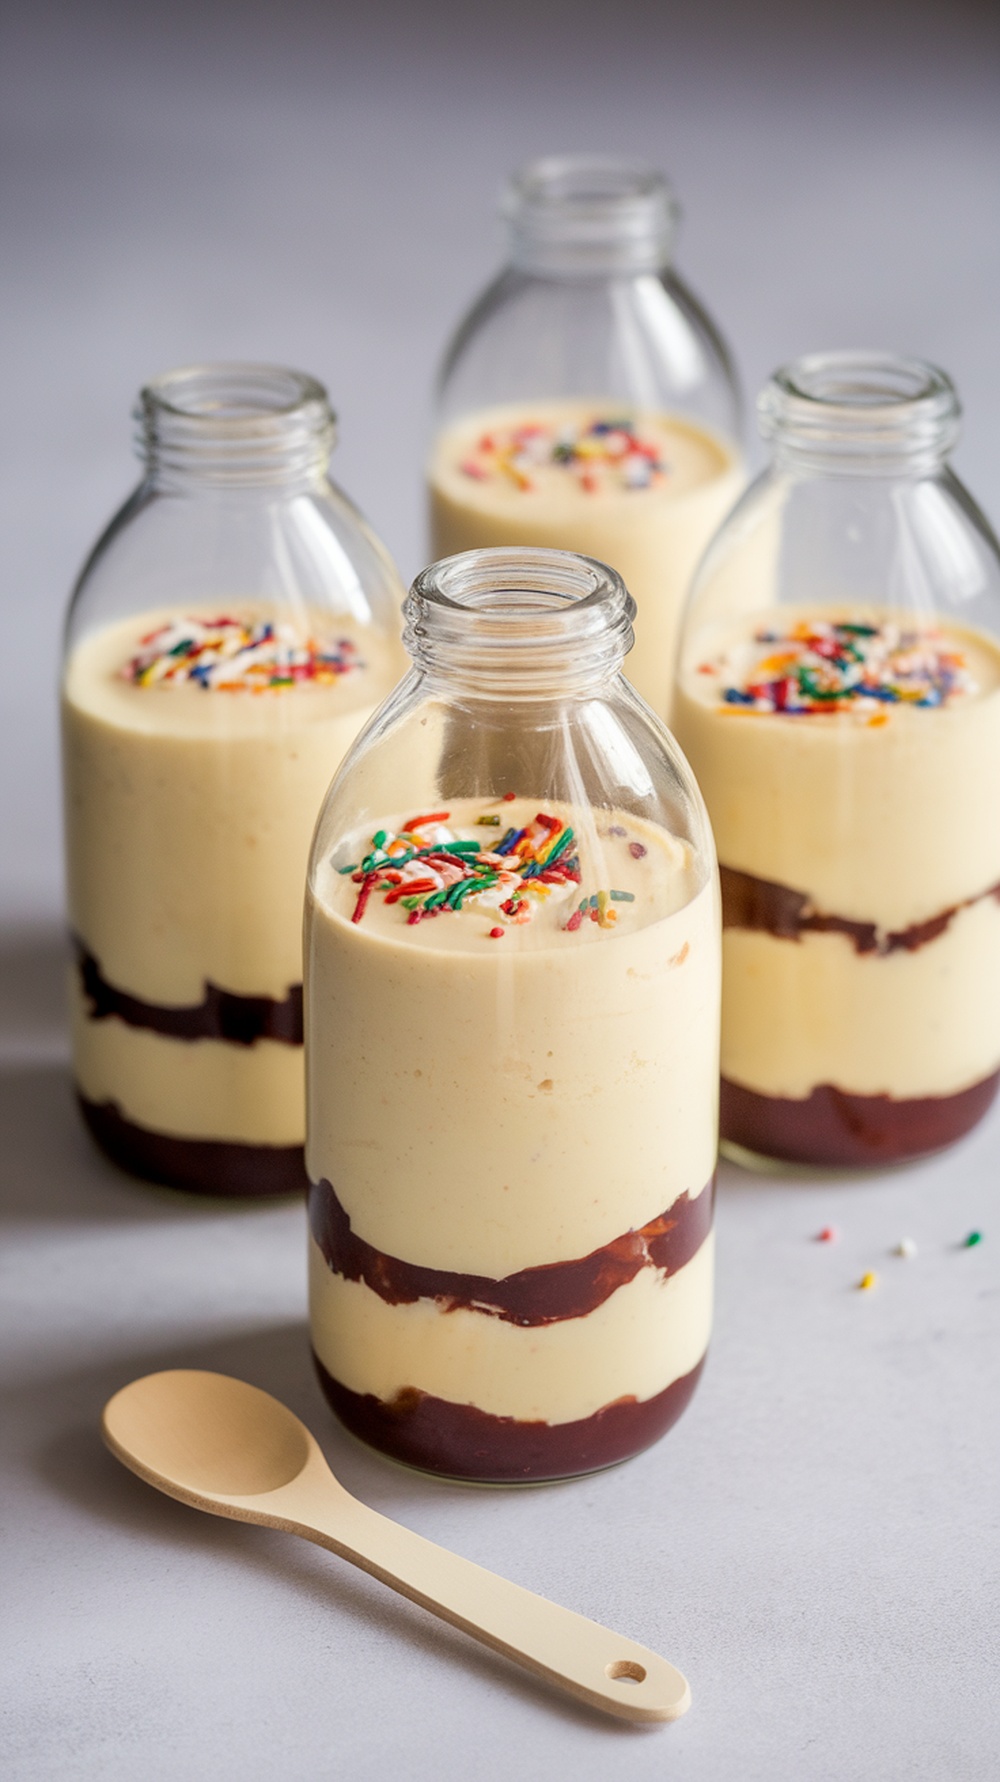
Vanilla pudding parfaits served in baby bottles are a fun and playful dessert that’s perfect for any baby shower. These treats combine creamy vanilla pudding with layers of chocolate sauce, creating a delightful contrast of flavors that everyone will love. The presentation in mini bottles adds a whimsical touch, making them a hit among guests of all ages.
This recipe is simple to put together and requires no baking, making it an easy option for those who want a delicious dessert without the fuss. Just layer the pudding and chocolate sauce, add some colorful sprinkles on top, and you’re ready to go!
Ingredients
- 2 cups vanilla pudding
- 1 cup chocolate sauce
- 1 cup whipped cream
- Sprinkles for topping
- 4-6 clean baby bottles or clear cups
Instructions
- Prepare the vanilla pudding according to package instructions and let it cool.
- In each baby bottle, layer a spoonful of chocolate sauce at the bottom.
- Add a layer of vanilla pudding on top of the chocolate sauce.
- Continue alternating layers of chocolate sauce and vanilla pudding until the bottles are filled.
- Top with a dollop of whipped cream and sprinkle with colorful sprinkles.
- Chill in the refrigerator for at least 30 minutes before serving to allow the layers to set.
Chocolate Baby Blocks Cake Pops
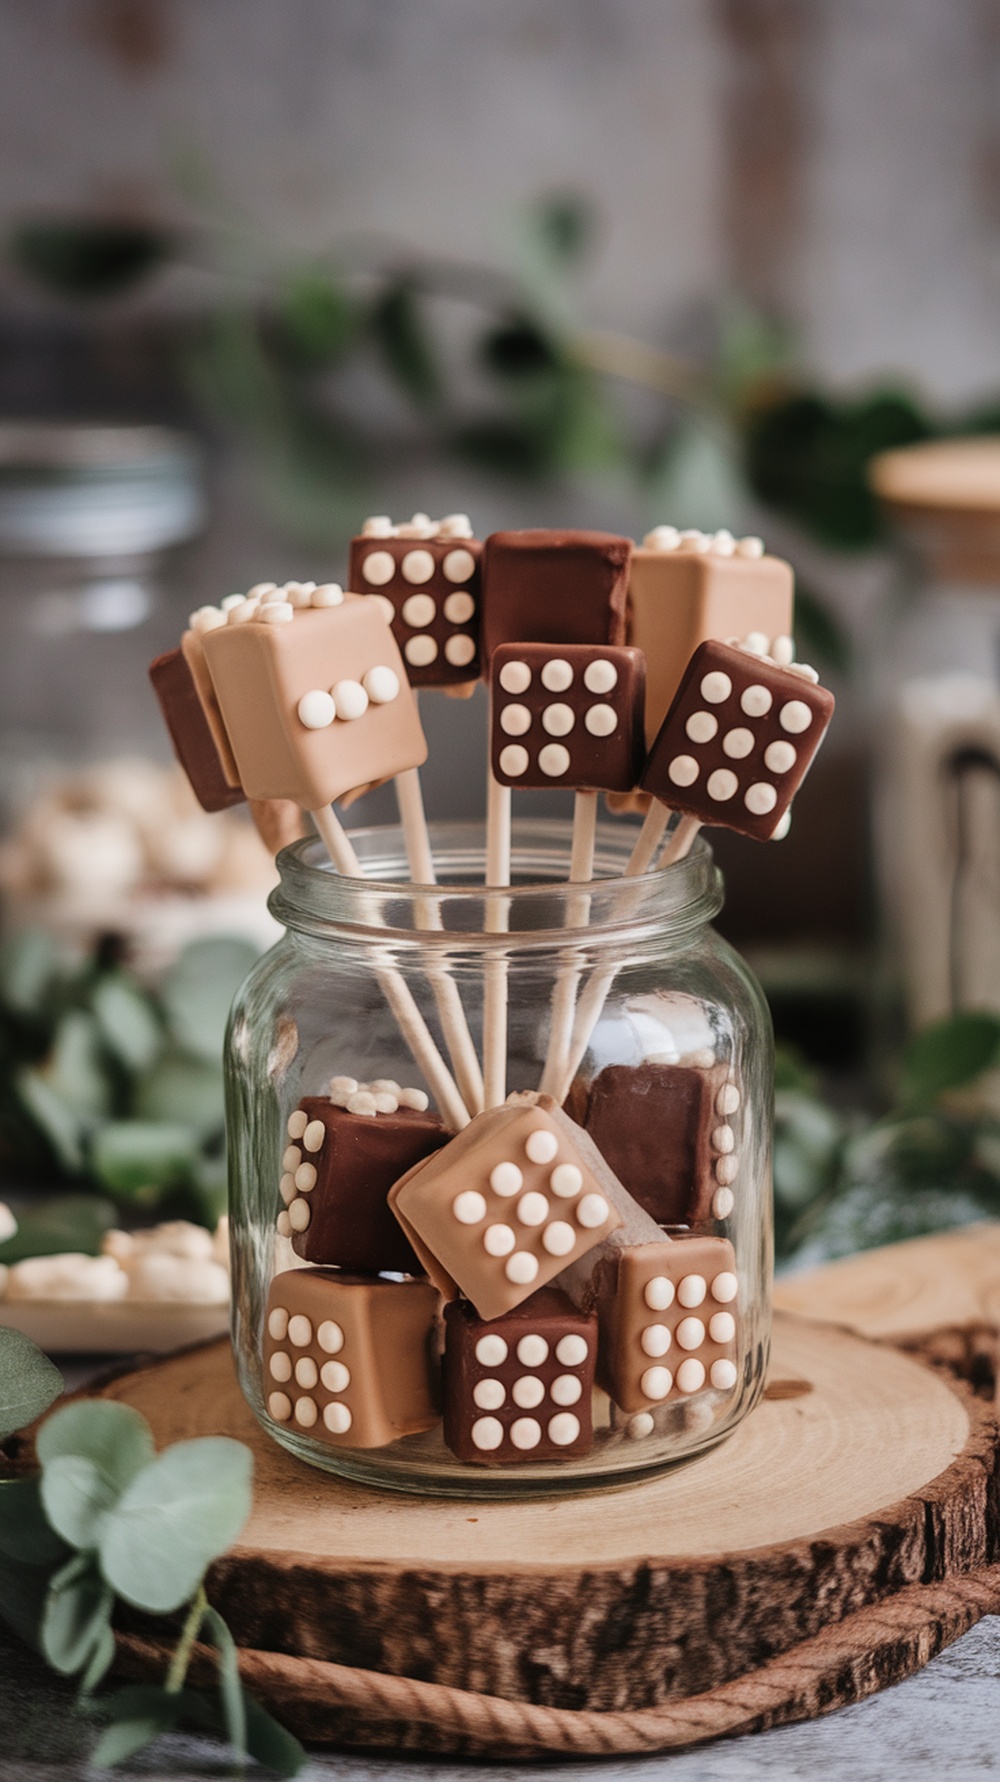
Chocolate Baby Blocks Cake Pops are a sweet treat that’s perfect for any baby shower. These delightful little pops are not only adorable but also packed with rich chocolate flavor. They’re made with a simple cake mixture, coated in melt-in-your-mouth chocolate, and decorated to resemble cute baby blocks. This recipe is easy to follow, making it a fun activity for both novice and seasoned bakers.
The combination of chocolate and cake creates a rich, satisfying texture, while the charming design adds a playful touch to your dessert table. Whether you’re serving them at a baby shower or another celebration, these cake pops will surely be a hit!
Ingredients
- 1 box of chocolate cake mix
- 1/2 cup of butter, softened
- 1 cup of powdered sugar
- 1/4 cup of milk
- 1 cup of chocolate melting wafers (milk or dark chocolate)
- 1/2 cup of white chocolate melting wafers
- Cake pop sticks
Instructions
- Bake the Cake: Prepare the chocolate cake mix according to the package instructions. Once baked, allow it to cool completely.
- Make the Cake Balls: Crumble the cooled cake into a large bowl and mix in softened butter, powdered sugar, and milk until fully combined. Roll the mixture into small balls, about 1 inch in diameter.
- Add Sticks: Insert cake pop sticks into each ball and place them on a baking sheet. Chill in the refrigerator for at least 30 minutes to firm up.
- Coat the Pops: Melt the chocolate wafers in a microwave-safe bowl. Dip each cake pop into the melted chocolate, ensuring it’s completely coated. Allow any excess chocolate to drip off.
- Decorate: Before the chocolate sets, use the melted white chocolate to create dots on the pops to resemble dice. Let the cake pops sit until the chocolate is fully hardened.
- Serve: Once set, arrange your Chocolate Baby Blocks Cake Pops in a fun display and enjoy!
Sugar Cookie Baby Onesies with Icing
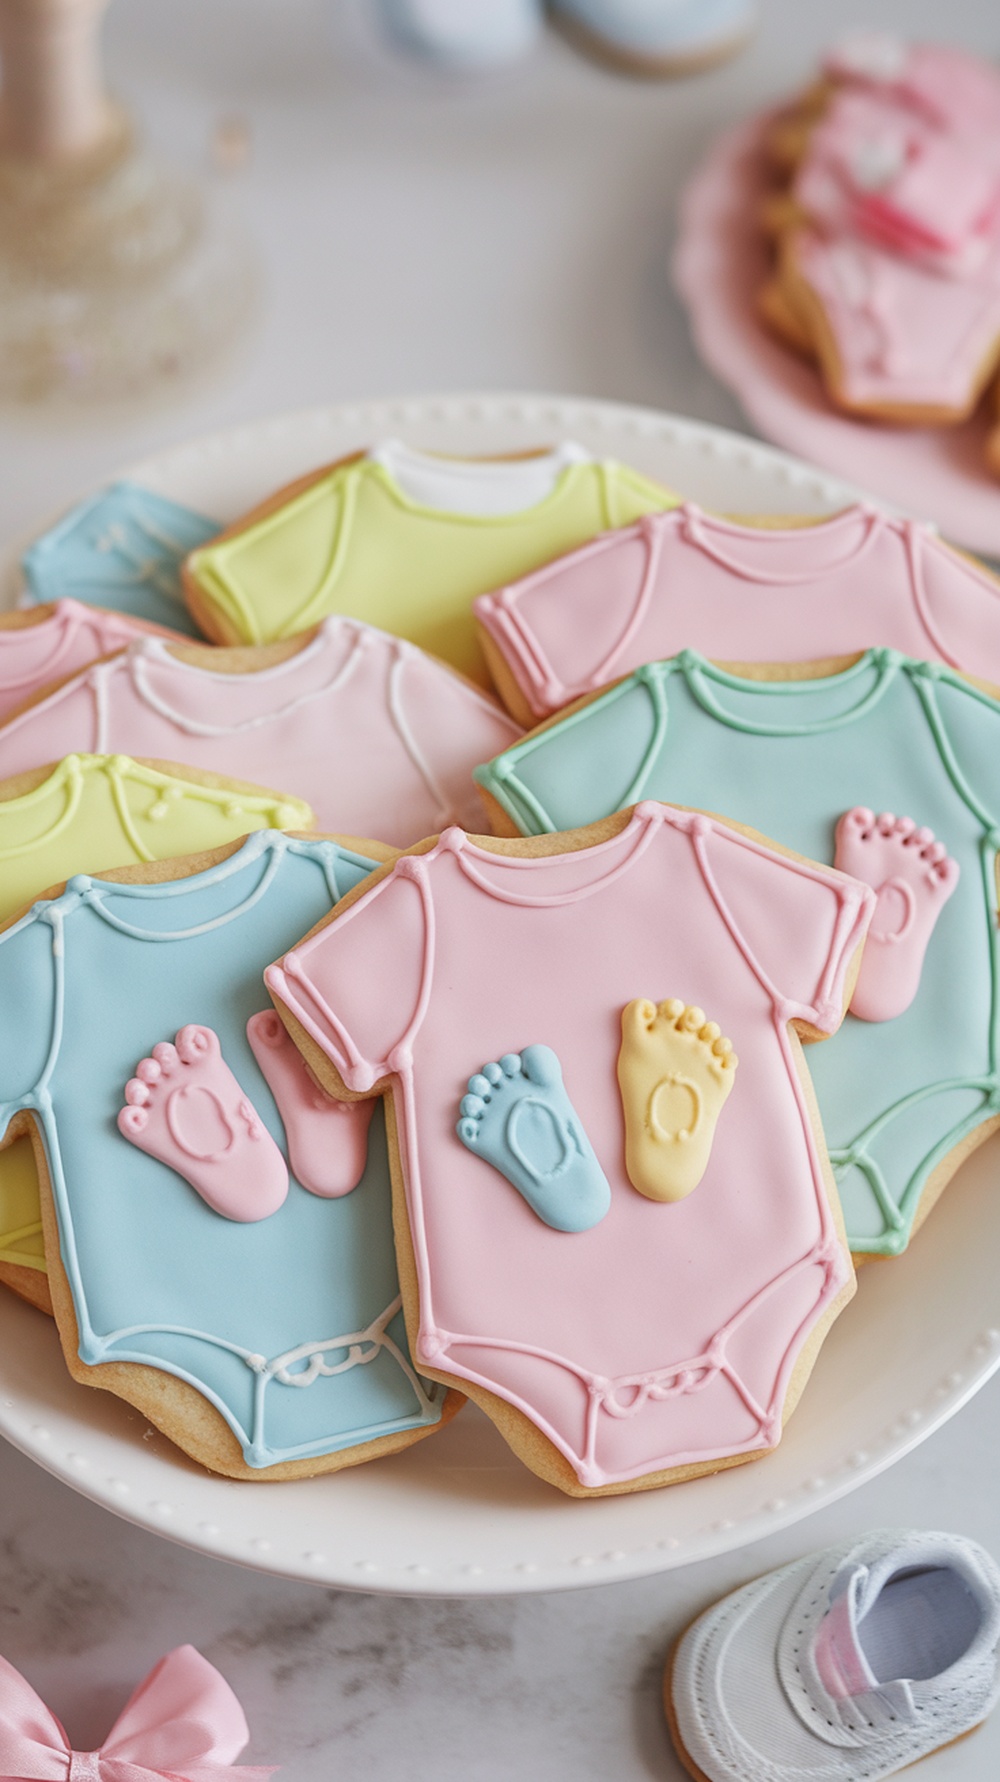
These delightful sugar cookie baby onesies are not just adorable; they’re also a treat that everyone will love at your baby shower! With a sweet and buttery flavor, these cookies are soft and melt in your mouth, making them the perfect dessert for celebrating a new arrival.
Crafting these cookies is pretty simple, even if you’re not a baking pro. With a few basic ingredients and some colorful icing, you can create a batch of fun, themed treats that will have your guests raving. They’re sure to be a hit!
Ingredients
- 3 cups all-purpose flour
- 1 cup unsalted butter, softened
- 1 cup granulated sugar
- 1 large egg
- 1 teaspoon vanilla extract
- 1 teaspoon baking powder
- 1/2 teaspoon salt
- Food coloring (various colors)
- 3 cups powdered sugar
- 2 tablespoons milk
- 1 tablespoon corn syrup
Instructions
- Make the Dough: In a mixing bowl, cream together the softened butter and sugar until light and fluffy. Add the egg and vanilla extract, mixing well. Gradually add the flour, baking powder, and salt, mixing until the dough comes together.
- Chill the Dough: Wrap the dough in plastic wrap and refrigerate for at least 1 hour to firm it up, making it easier to roll out.
- Roll and Cut: Preheat the oven to 350°F (175°C). On a floured surface, roll out the chilled dough to about 1/4 inch thick. Use a baby onesie cookie cutter to cut out shapes and place them on lined baking sheets.
- Bake: Bake for 8-10 minutes or until the edges are lightly golden. Let them cool completely on a wire rack.
- Prepare the Icing: In a bowl, mix powdered sugar, milk, and corn syrup until smooth. Divide into smaller bowls and color with food coloring as desired.
- Icing the Cookies: Once the cookies are cool, pipe or spread the icing onto each cookie. Use a contrasting color for details, such as tiny foot prints. Allow the icing to dry before serving.
Mini Cupcakes with Baby-themed Toppers
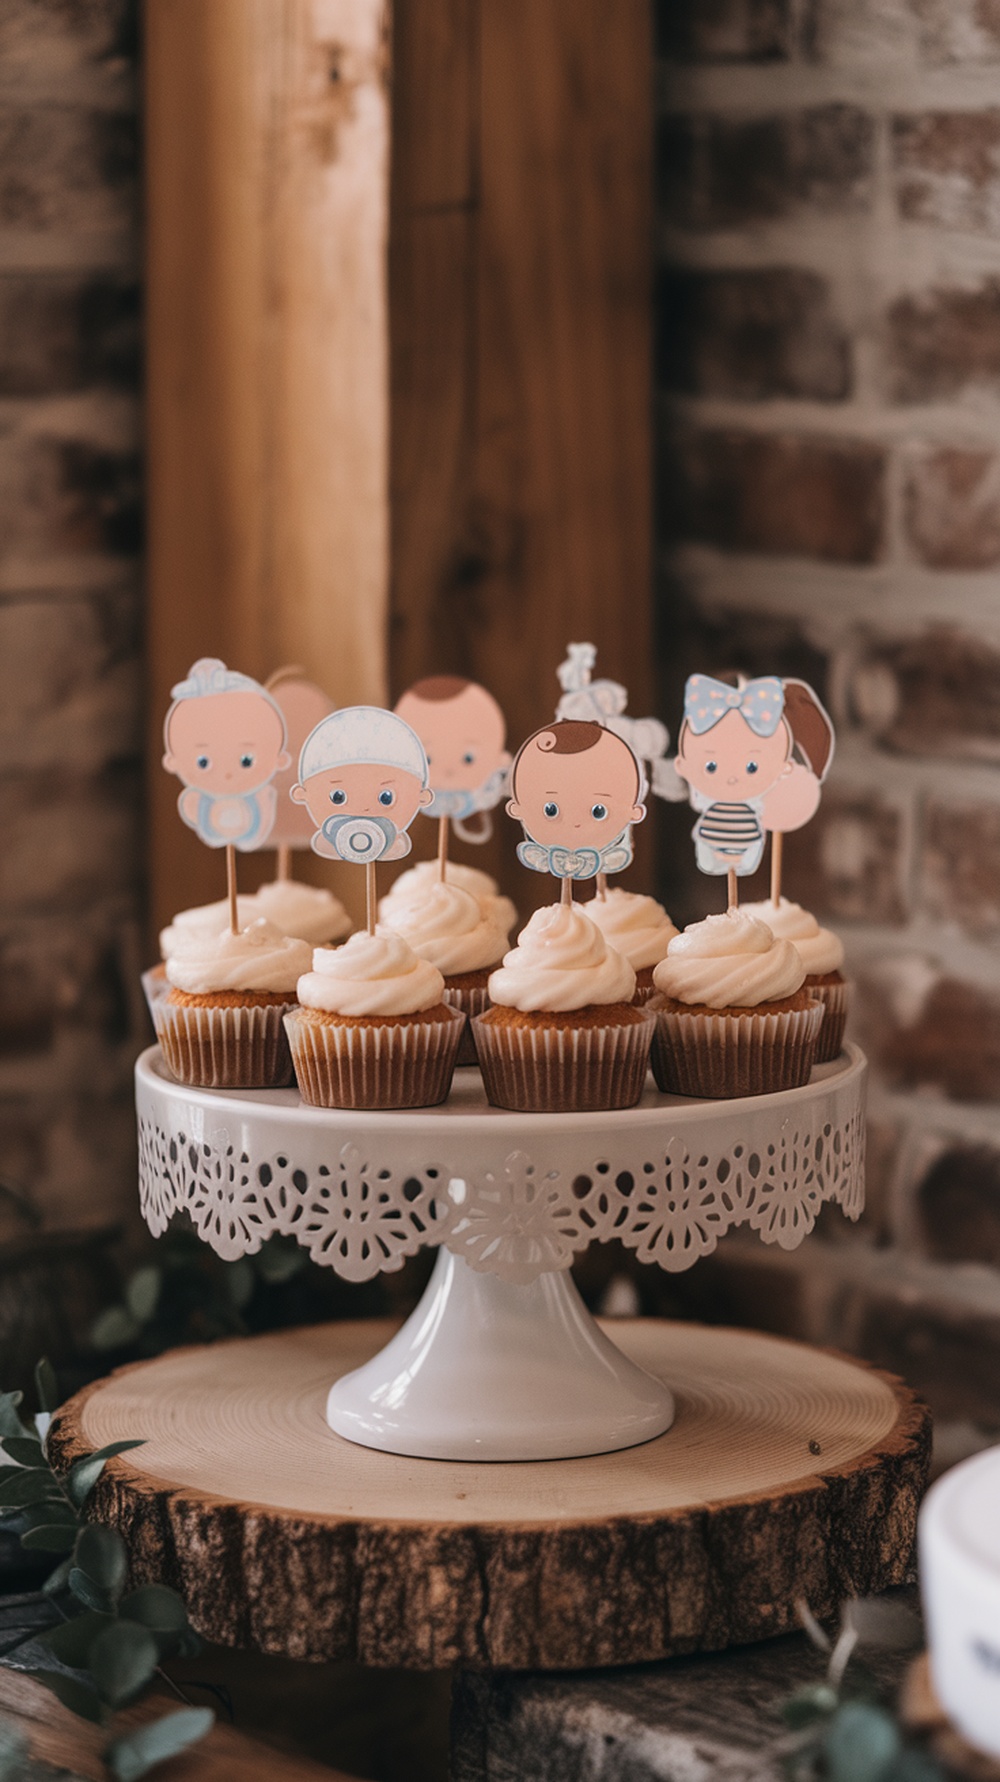
Mini cupcakes are perfect for a baby shower, bringing a delightful touch to the celebration. These bite-sized treats are not only adorable but also packed with flavor, making them a hit with guests of all ages. With a light, fluffy texture and a sweet frosting, each cupcake is a little piece of joy that adds to the festive atmosphere.
Making these mini cupcakes is quite simple, and you can customize them to fit your theme. Just add some playful baby-themed toppers to really make them stand out. Whether you’re trying vanilla, chocolate, or even funfetti, these cupcakes will surely be a crowd-pleaser!
Ingredients
- 1 1/4 cups all-purpose flour
- 1 cup granulated sugar
- 1/2 cup unsalted butter, softened
- 1/2 cup milk
- 2 large eggs
- 1 1/2 teaspoons baking powder
- 1 teaspoon vanilla extract
- 1/4 teaspoon salt
- 1 cup buttercream frosting
- Baby-themed toppers
Instructions
- Preheat the oven to 350°F (175°C) and line a mini cupcake pan with liners.
- In a large bowl, cream together the softened butter and sugar until light and fluffy. Add the eggs, one at a time, mixing well after each addition.
- Stir in the milk and vanilla extract, followed by the dry ingredients: flour, baking powder, and salt. Mix until just combined.
- Fill each cupcake liner about 2/3 full with batter. Bake for 12-15 minutes or until a toothpick inserted in the center comes out clean.
- Let the cupcakes cool completely before frosting. Once cooled, pipe the buttercream frosting on top and add your cute baby-themed toppers.
Chocolate Dipped Strawberries with Sprinkles
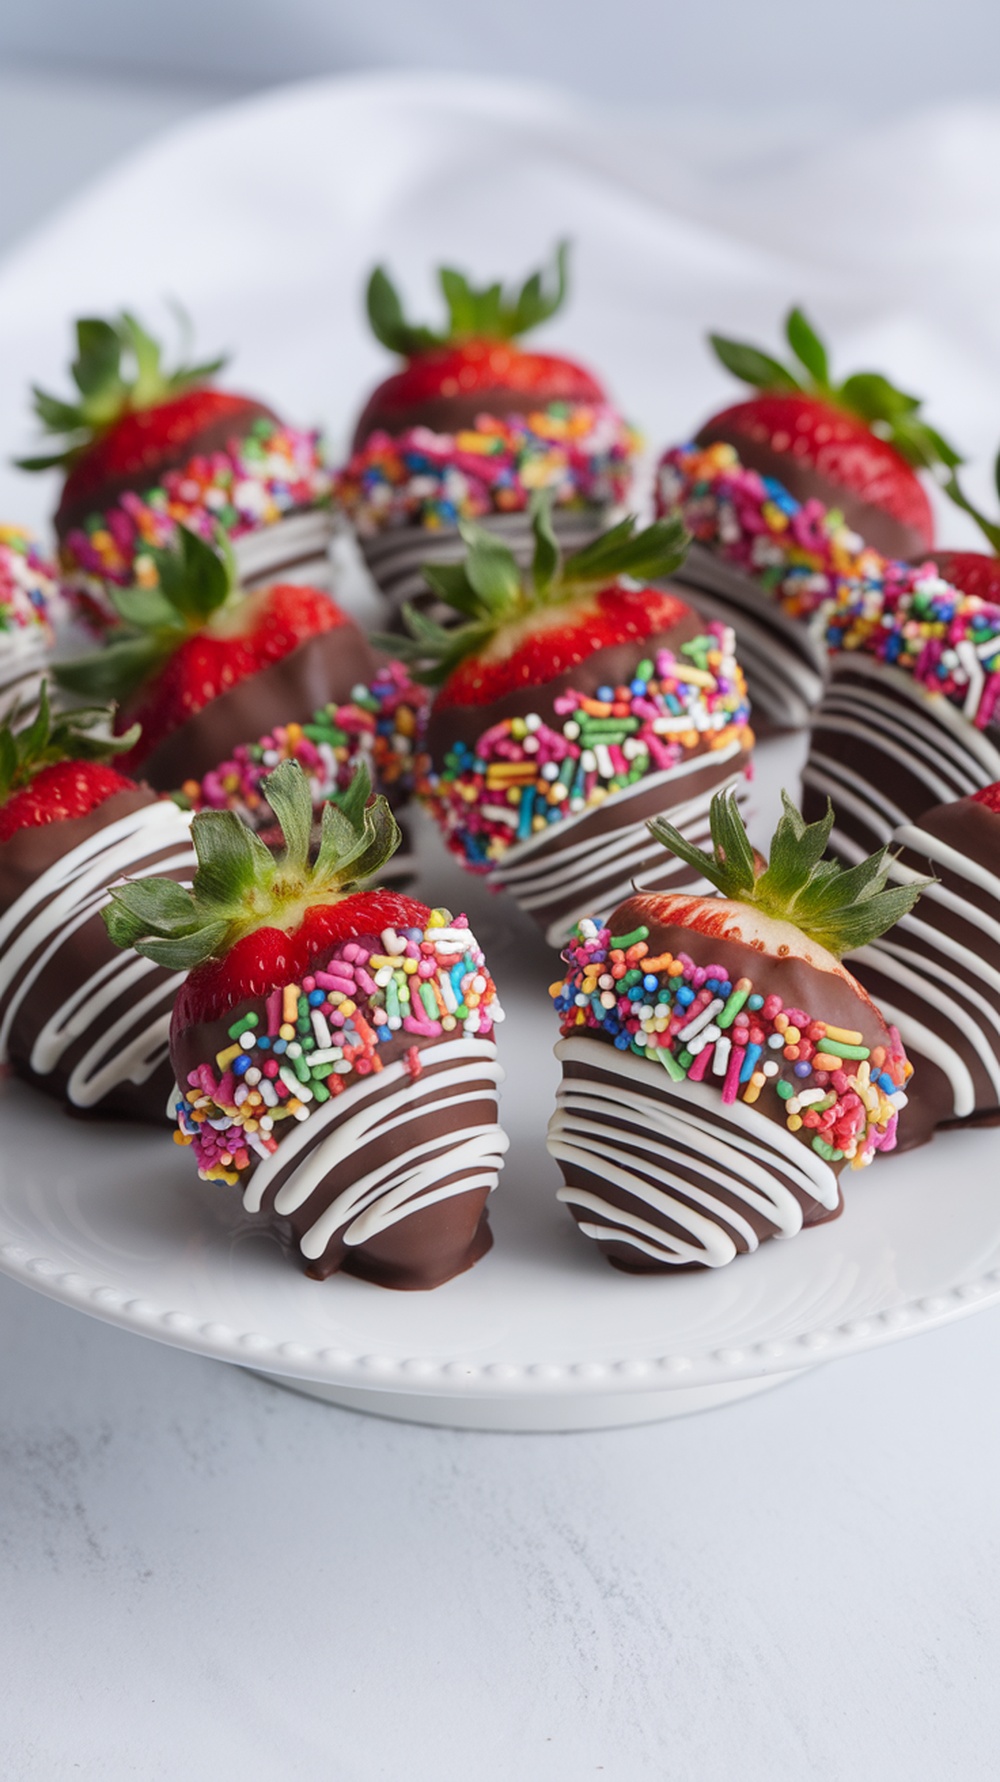
Chocolate dipped strawberries are a fun and delicious treat that everyone loves. They combine the sweetness of fresh strawberries with rich chocolate, making them a perfect choice for celebrations, especially baby showers. With a pop of color from sprinkles, these treats are not only tasty but also visually appealing.
This recipe is simple and quick to make, perfect for those who may not have much baking experience. Whether you’re preparing for a sweet table at a baby shower or just want something special for a gathering, chocolate dipped strawberries will surely impress your guests!
Ingredients
- 1 pound fresh strawberries
- 8 ounces dark chocolate chips
- 4 ounces white chocolate chips
- 1 cup rainbow sprinkles
Instructions
- Wash and dry the strawberries thoroughly. Ensure they’re completely dry for the chocolate to stick.
- Melt the dark chocolate in a microwave-safe bowl, heating in 30-second intervals, stirring until smooth.
- Dip each strawberry halfway into the melted dark chocolate, letting excess chocolate drip off. Immediately sprinkle rainbow sprinkles on the chocolate-covered part.
- Place the dipped strawberries on a parchment-lined baking sheet.
- Melt the white chocolate in the same way as the dark chocolate. Drizzle it over the strawberries for an extra touch.
- Refrigerate for about 30 minutes to set the chocolate before serving.
Soft Pink Macarons with Cream Filling
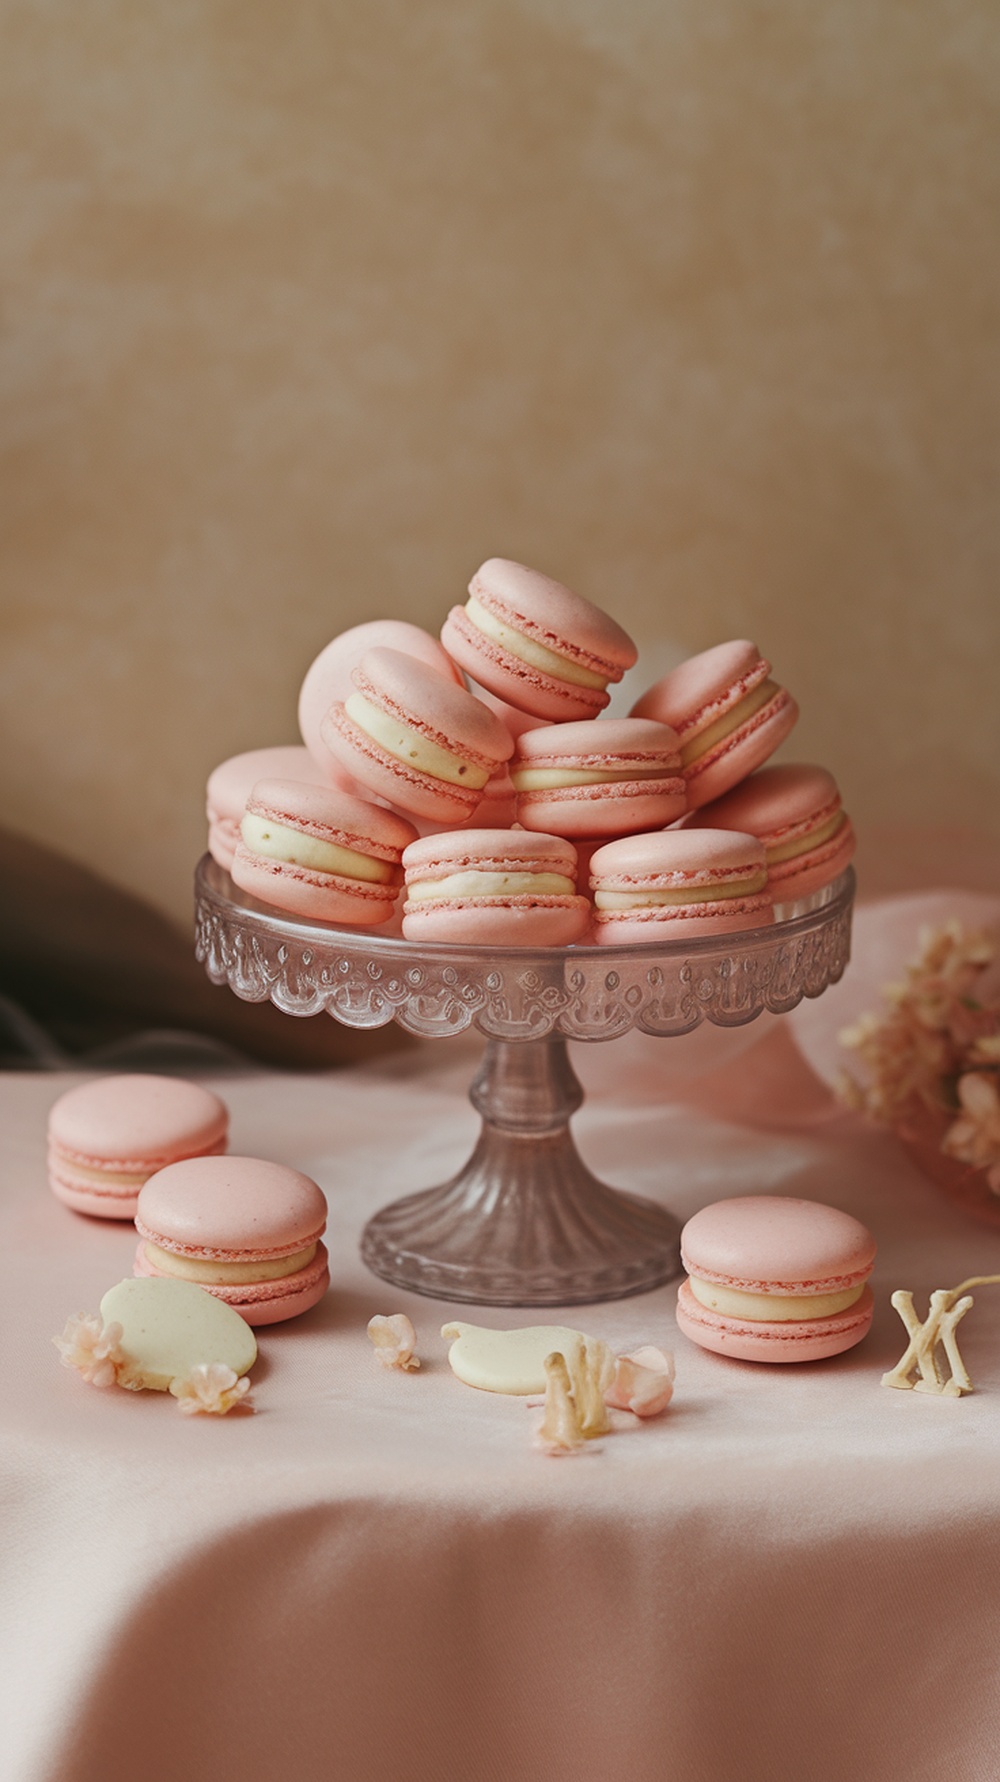
Soft pink macarons are not just a treat for the taste buds; they also add a charming touch to any baby shower. These delicate French cookies offer a delightful combination of crisp outer shells and a smooth, creamy filling. The subtle sweetness and light flavor make them a perfect match for celebratory occasions.
Making macarons can seem tricky, but with a little patience, you’ll be crafting these lovely confections in no time. The bright pink color not only makes them visually appealing but also adds a joyful vibe to your dessert table.
Ingredients
- 1 cup almond flour
- 1 3/4 cups powdered sugar
- 3 large egg whites
- 1/4 cup granulated sugar
- 1/4 teaspoon cream of tartar
- 1 teaspoon vanilla extract
- Pink food coloring
- 1/2 cup unsalted butter, softened
- 1 cup powdered sugar (for filling)
- 1 teaspoon vanilla extract (for filling)
- 2 tablespoons heavy cream
Instructions
- Prepare the Dry Ingredients: In a bowl, sift together almond flour and powdered sugar. Set aside.
- Whip Egg Whites: In a separate bowl, beat the egg whites until foamy. Add cream of tartar and granulated sugar gradually, continuing to beat until stiff peaks form.
- Add Color: Add pink food coloring and vanilla extract to the meringue, mixing until well combined.
- Combine Mixtures: Gently fold the dry ingredients into the meringue using a spatula until fully incorporated. The mixture should flow like lava.
- Pipe the Macarons: Transfer the batter to a piping bag and pipe small circles onto a parchment-lined baking sheet. Tap the sheet on the counter to release any air bubbles.
- Let Them Rest: Allow the piped macarons to sit at room temperature for 30-60 minutes until they form a skin.
- Bake: Preheat the oven to 300°F (150°C). Bake the macarons for 15-20 minutes, or until they can be lifted off the parchment without sticking.
- Make the Cream Filling: In a bowl, beat the softened butter until smooth, then gradually add the powdered sugar, vanilla extract, and heavy cream until creamy.
- Assemble: Once the macarons have cooled, pipe the cream filling onto the flat side of one macaron and sandwich it with another.
- Enjoy: Let the assembled macarons rest for at least an hour before serving to allow the flavors to meld.
Lemon Meringue Tartlets with Whipped Cream
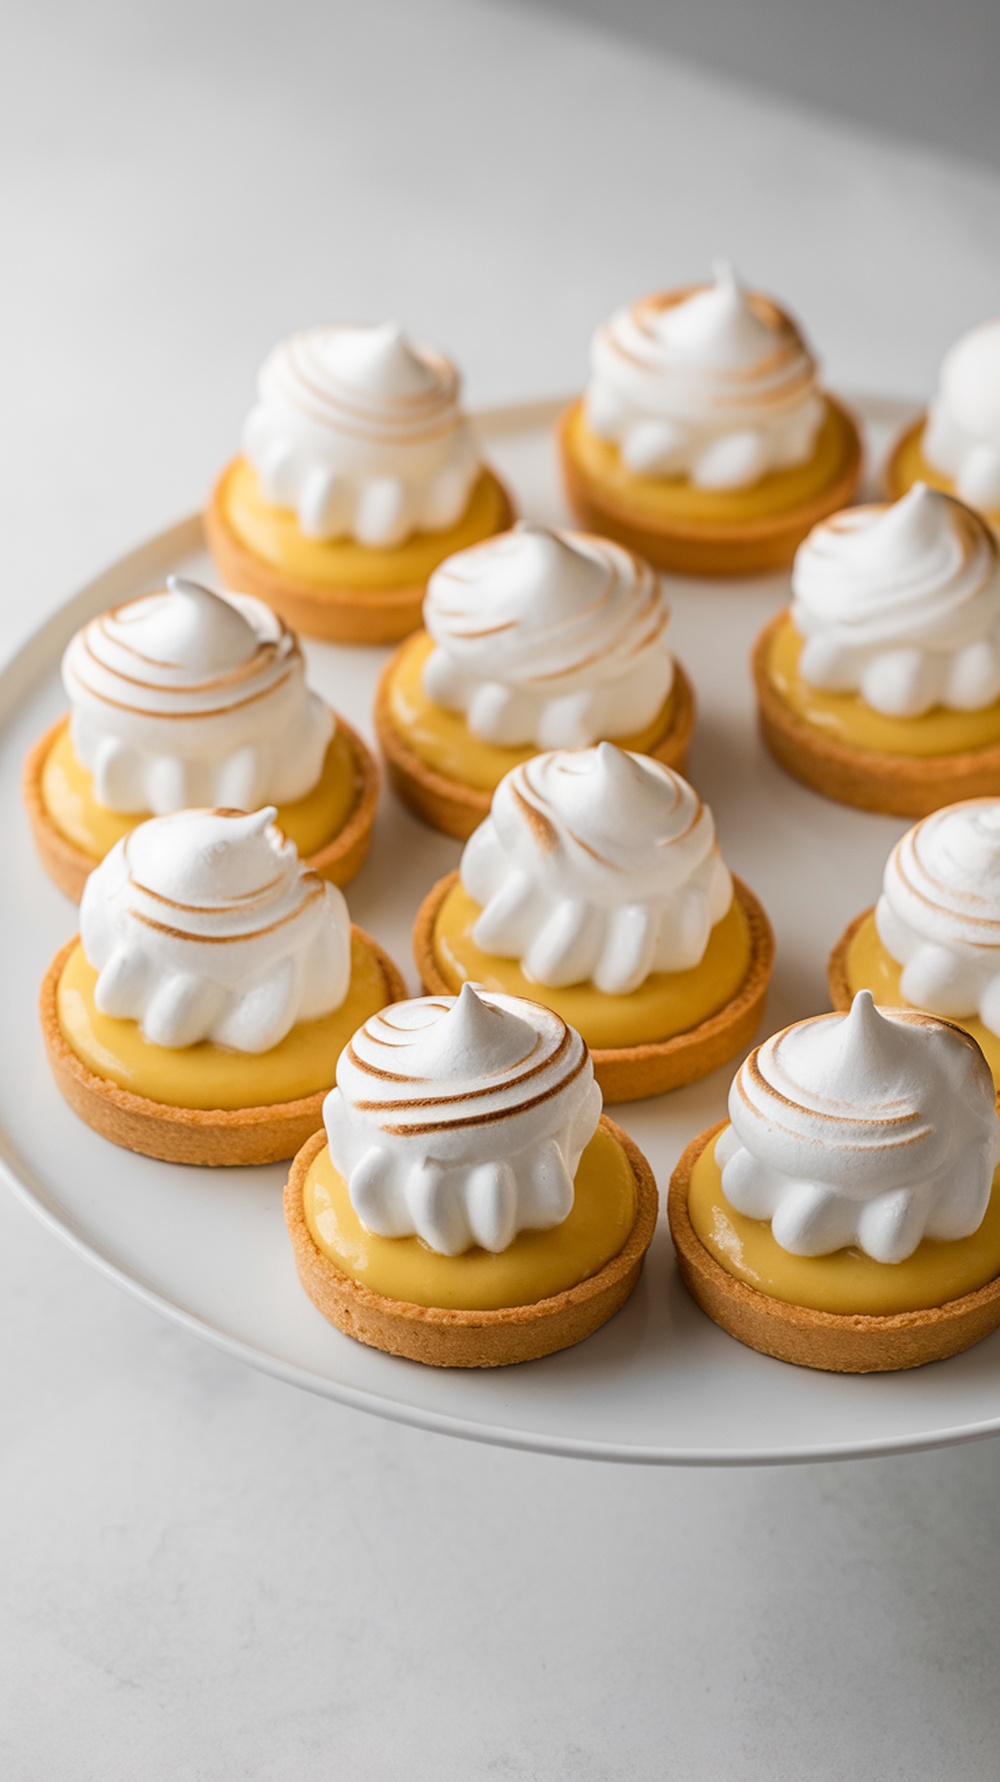
Lemon meringue tartlets are a delightful treat that balance the zesty brightness of lemon curd with the airy sweetness of meringue. These mini desserts are not only visually appealing but also bursting with flavor, making them a perfect choice for a baby shower celebration.
These tartlets are surprisingly simple to make! With a buttery crust, rich lemon filling, and fluffy meringue topping, they are sure to impress your guests without requiring hours in the kitchen. Plus, their bite-sized nature makes them ideal for a festive occasion.
Ingredients
- 1 cup all-purpose flour
- 1/4 cup powdered sugar
- 1/2 cup unsalted butter, softened
- 1 egg yolk
- 2 tablespoons cold water
- 1 cup granulated sugar
- 1/4 cup cornstarch
- 1/2 cup water
- 3 large egg yolks
- 1/2 cup fresh lemon juice
- 2 tablespoons lemon zest
- 2 tablespoons unsalted butter
- 3 large egg whites
- 1/4 teaspoon cream of tartar
- 1/2 cup heavy cream (for whipped cream)
- 1 tablespoon sugar (for whipped cream)
Instructions
- Make the Crust: In a bowl, mix flour and powdered sugar. Cut in butter until crumbly. Stir in egg yolk and cold water until a dough forms. Press into mini tart pans and bake at 350°F (175°C) for 10-12 minutes until lightly golden.
- Prepare the Lemon Filling: In a saucepan, combine granulated sugar, cornstarch, and water. Cook over medium heat until thickened. Whisk in egg yolks, lemon juice, and lemon zest. Remove from heat and stir in butter until melted.
- Fill the Tartlets: Pour the lemon filling into the baked crusts and let cool.
- Make the Meringue: Beat egg whites and cream of tartar until soft peaks form. Gradually add sugar and beat until stiff peaks form. Spread meringue over the filled tartlets.
- Brown the Meringue: Bake tartlets at 350°F (175°C) for about 5-7 minutes until meringue is golden brown.
- Prepare the Whipped Cream: In a bowl, whip heavy cream with sugar until soft peaks form. Serve dollops of whipped cream on top of each tartlet before serving.
Rainbow Fruit Skewers with Yogurt Dip
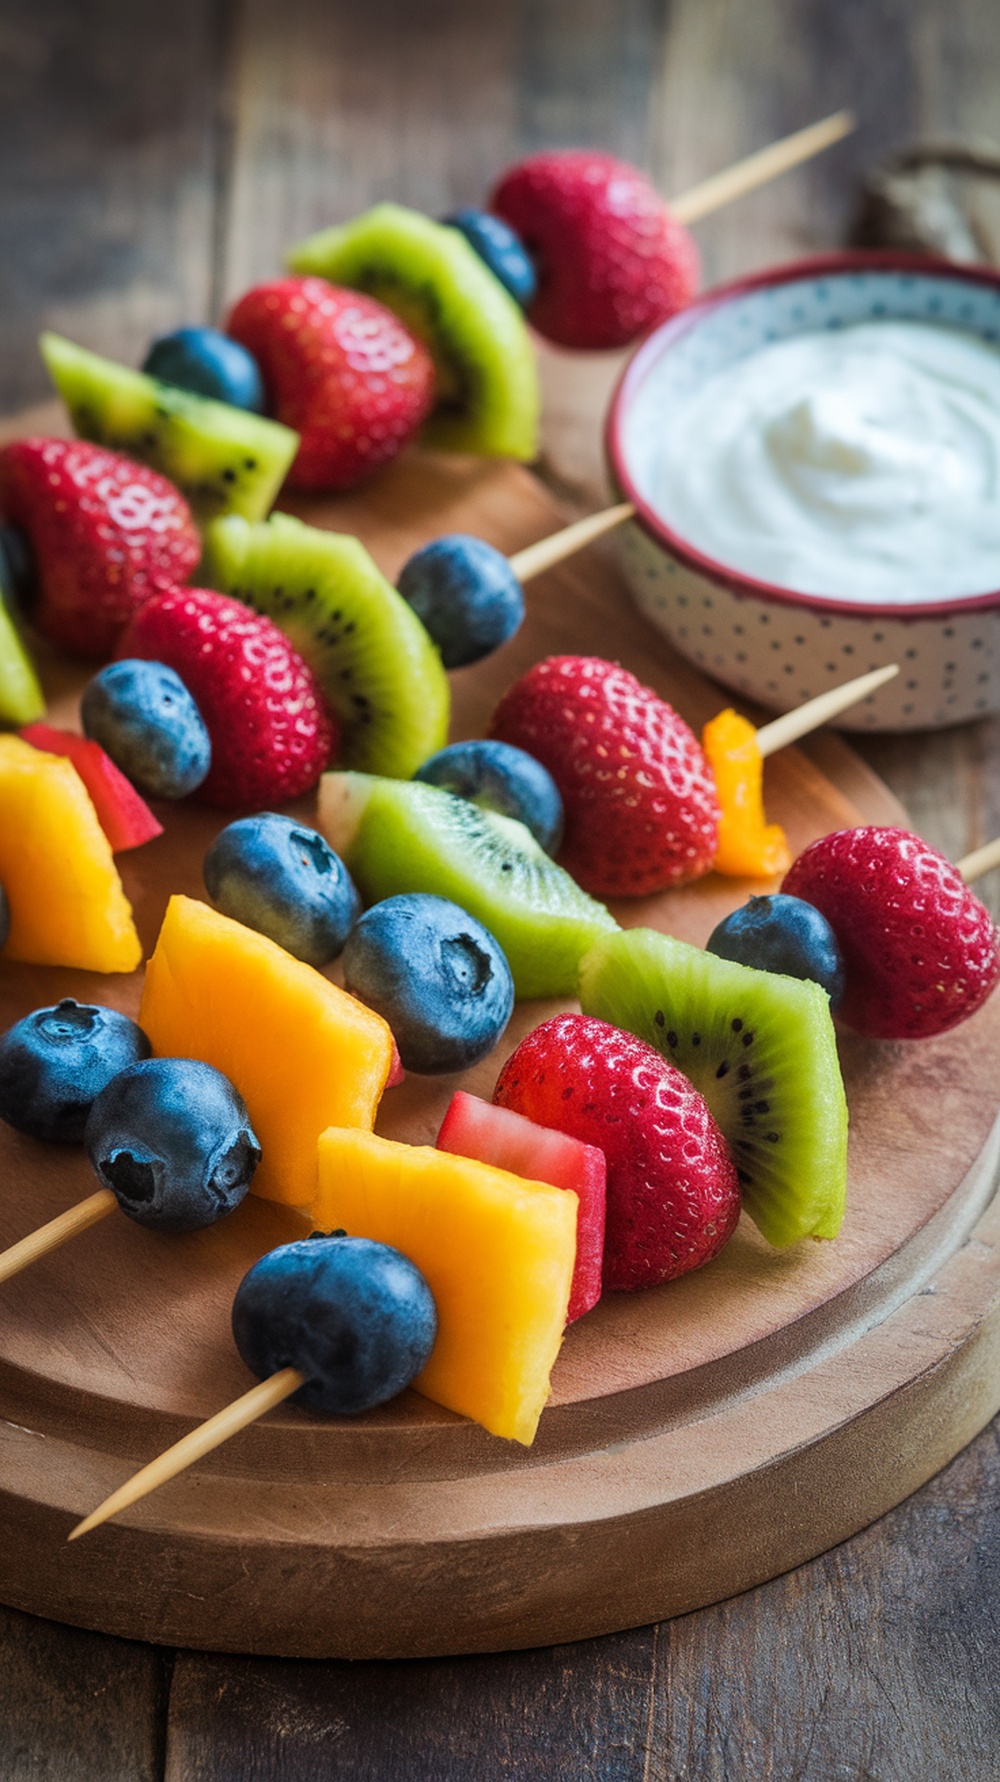
Rainbow Fruit Skewers with Yogurt Dip are a fun and colorful treat perfect for any baby shower. These skewers combine a variety of fresh fruits, creating a visually appealing and delicious snack that everyone will love. The sweetness of the fruits pairs beautifully with the creamy yogurt dip, making each bite a refreshing delight.
This recipe is simple to make, requiring minimal prep time. It’s an excellent way to add a healthy option to your dessert table while still feeling festive!
Ingredients
- 1 cup strawberries, hulled
- 1 cup blueberries
- 1 cup kiwi, peeled and sliced
- 1 cup pineapple, cubed
- 1 cup green grapes
- 1 cup bell peppers (red or yellow), diced
- 1 cup vanilla yogurt
- 1 tablespoon honey (optional)
- Skewers
Instructions
- Prepare the Fruit: Wash and cut all the fruits into bite-sized pieces. If using, dice the bell peppers into small squares.
- Assemble the Skewers: Take a skewer and thread the fruits and bell peppers onto it in a colorful, alternating pattern. Repeat until all ingredients are used.
- Make the Yogurt Dip: In a small bowl, mix the vanilla yogurt with honey, if desired, for added sweetness.
- Serve: Arrange the fruit skewers on a platter and serve with the yogurt dip on the side for dipping.
Peach Cobbler Cups with Crumble Topping
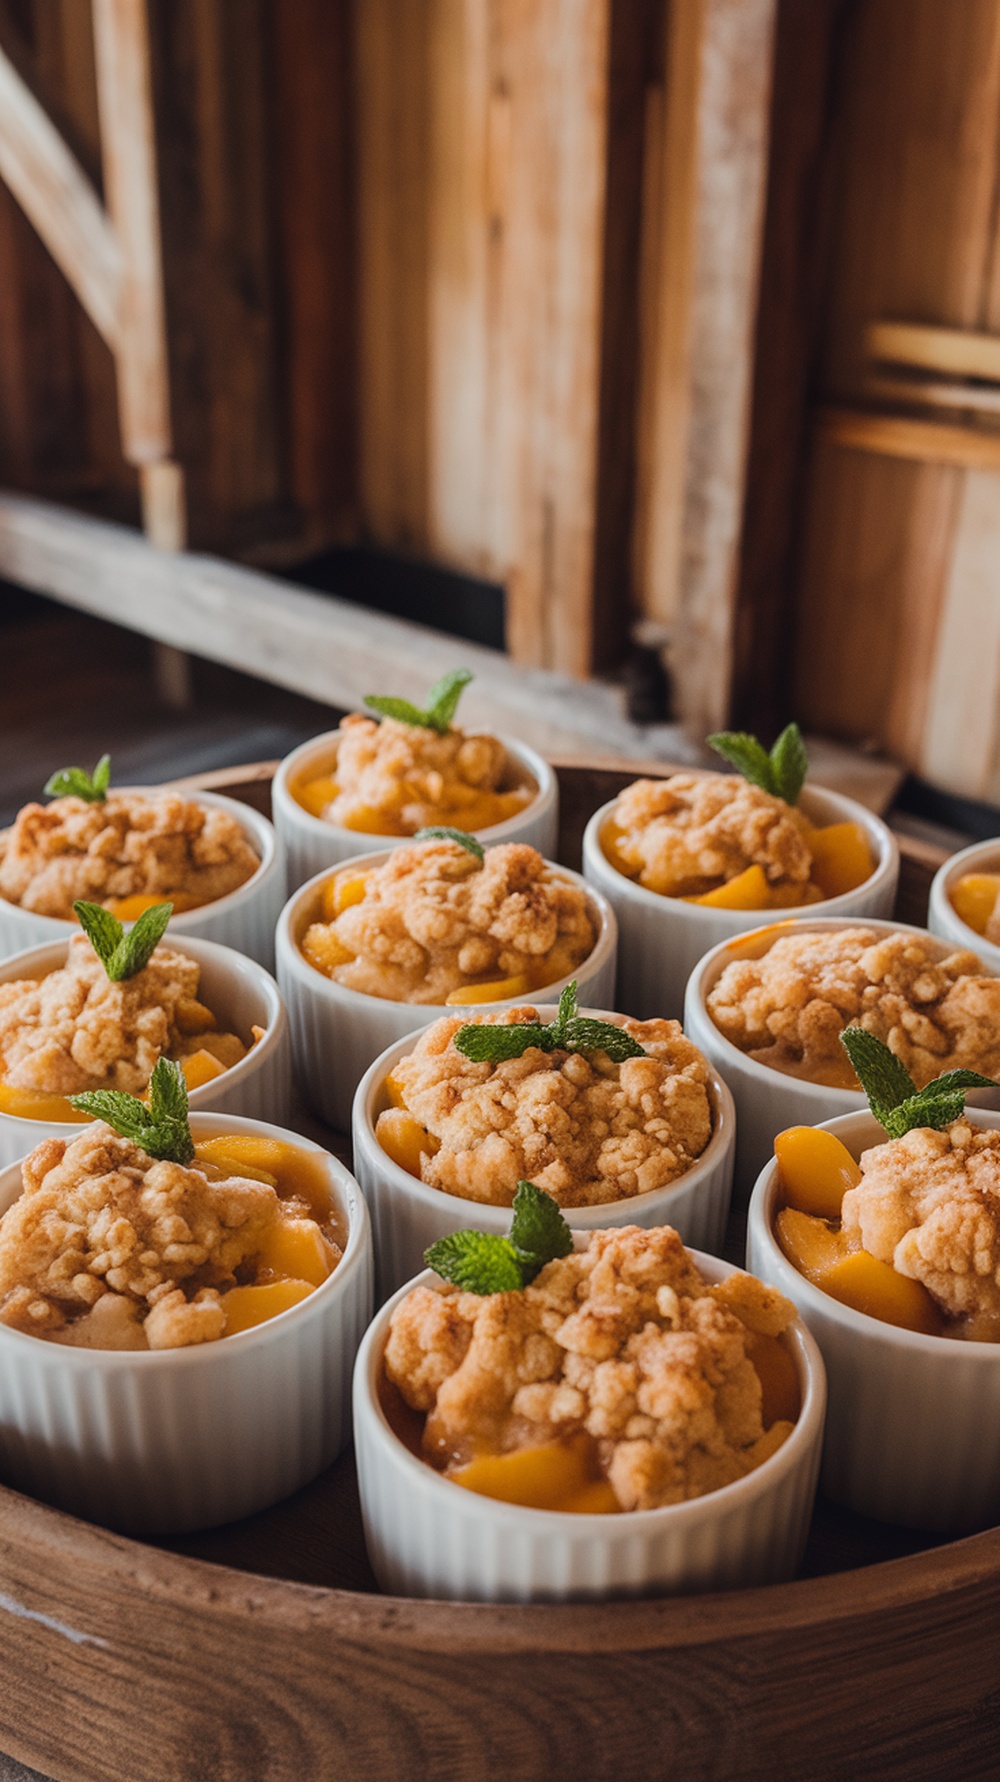
Peach Cobbler Cups are a delightful twist on the classic dessert. These individual servings pack the juicy flavor of ripe peaches topped with a crumbly, buttery topping. The sweetness of the peaches combined with the crunchy topping creates a perfect balance that everyone will love. Plus, they are super easy to make, making them ideal for a baby shower or any gathering.
These charming cups not only taste great but also look fantastic on a dessert table. Each cup is a little treasure, just waiting to be enjoyed. You’ll impress your guests without spending too much time in the kitchen!
Ingredients
- 2 cups fresh peaches, peeled and sliced
- 1/4 cup granulated sugar
- 1 tablespoon lemon juice
- 1 teaspoon vanilla extract
- 1 cup all-purpose flour
- 1/2 cup brown sugar, packed
- 1/2 cup rolled oats
- 1/4 teaspoon salt
- 1/2 cup unsalted butter, cold and cubed
- Fresh mint leaves, for garnish
Instructions
- Preheat your oven to 350°F (175°C).
- In a bowl, mix the sliced peaches with granulated sugar, lemon juice, and vanilla extract. Divide this mixture among individual ramekins.
- In another bowl, combine flour, brown sugar, oats, and salt. Add cold cubed butter and mix until the mixture resembles coarse crumbs.
- Sprinkle the crumble topping evenly over the peach mixture in each ramekin.
- Bake for about 25-30 minutes, or until the topping is golden brown. Allow to cool slightly before serving.
- Garnish with fresh mint leaves before serving.
Berry Tart with Whipped Cream
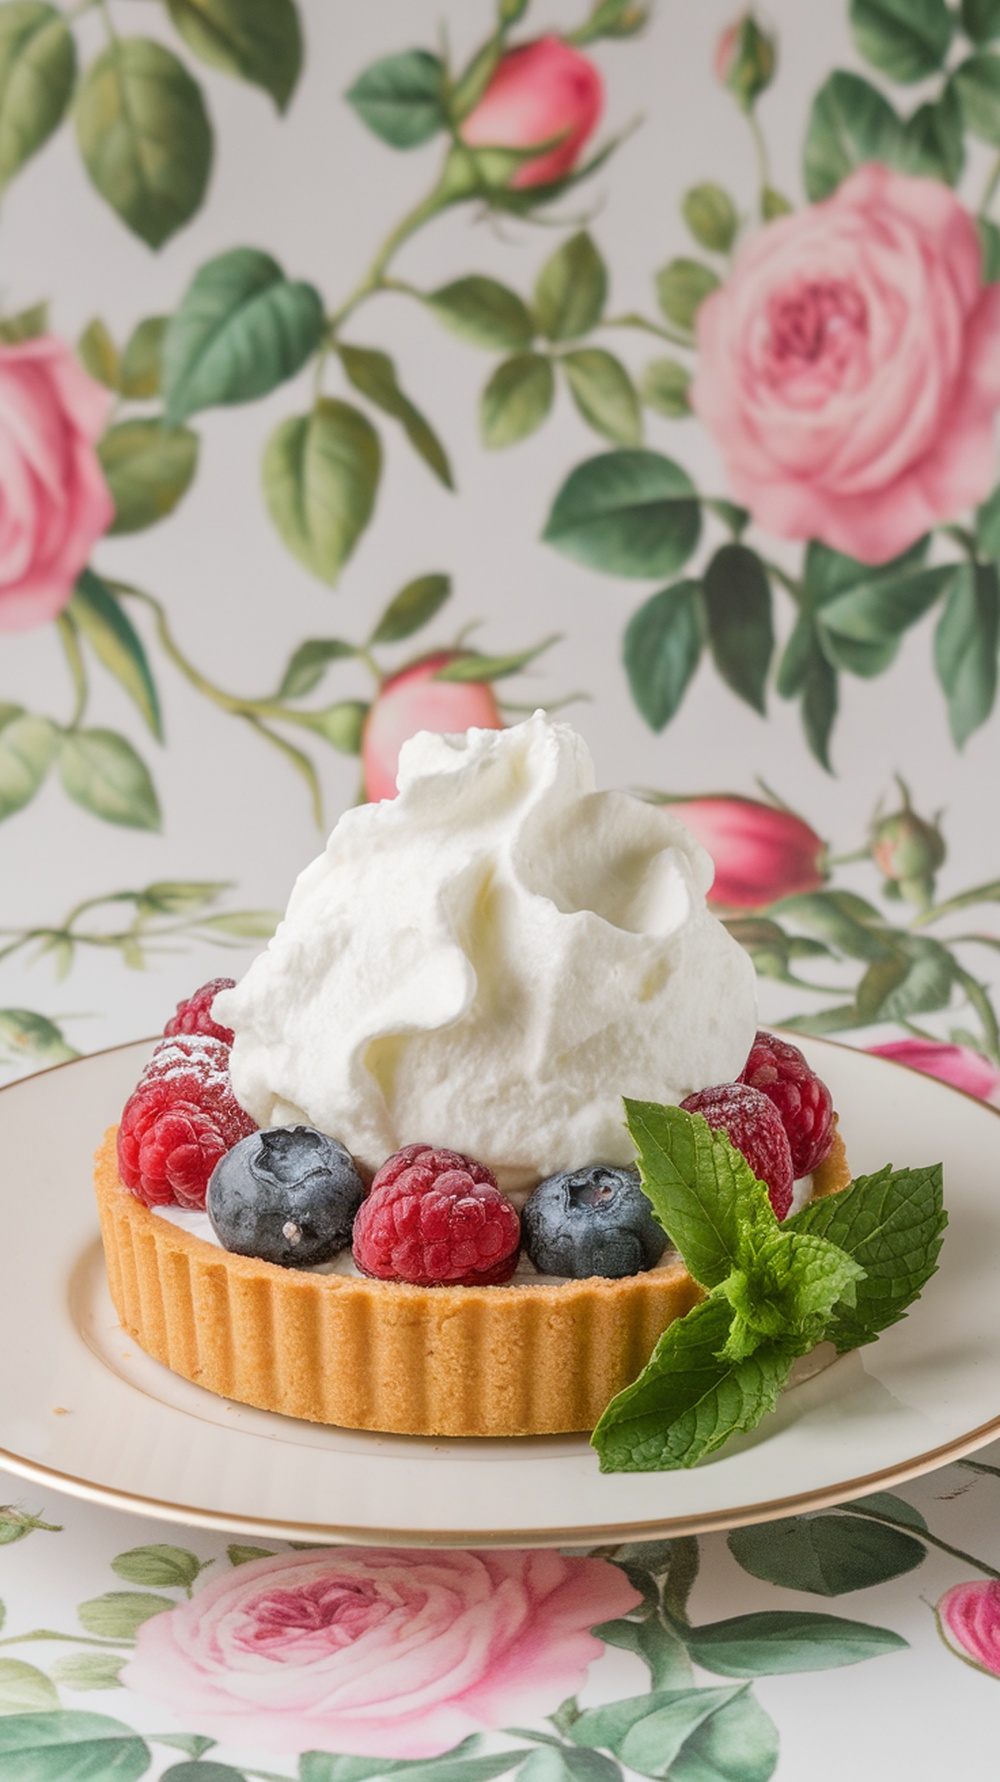
This berry tart is a delightful treat that perfectly balances sweet and tart flavors. The buttery crust complements the fresh berries beautifully, making it a fantastic dessert for any baby shower. The best part? It’s easy to whip up, so you can spend more time celebrating and less time in the kitchen!
The creamy whipped topping adds a lightness that pairs well with the juicy berries. It’s a crowd-pleaser that not only looks stunning but also tastes amazing. Everyone will love this refreshing dessert!
Ingredients
- 1 pre-made tart crust
- 2 cups mixed berries (strawberries, blueberries, raspberries)
- 1 cup heavy cream
- 1/4 cup powdered sugar
- 1 teaspoon vanilla extract
- Fresh mint leaves for garnish (optional)
Instructions
- Prepare the Crust: If using a frozen tart crust, bake according to package instructions and let it cool completely.
- Whip the Cream: In a large mixing bowl, combine heavy cream, powdered sugar, and vanilla extract. Beat with an electric mixer until soft peaks form.
- Assemble the Tart: Spoon the whipped cream into the cooled tart crust. Arrange mixed berries on top of the whipped cream, placing them as desired.
- Chill and Serve: Refrigerate the tart for at least 30 minutes before serving. Garnish with fresh mint leaves if desired.
Chocolate Chip Cookie Sandwiches with Frosting

Chocolate chip cookie sandwiches are a fantastic treat that combines the classic taste of chocolate chip cookies with a sweet, creamy filling. These cookies are soft, chewy, and filled with delicious frosting, making them a delightful addition to any baby shower dessert table. They offer a perfect blend of cookie and frosting that everyone will love.
The great part about this recipe is how simple it is to make. With just a few ingredients, you can whip up a batch that will impress your guests. They are not only fun to eat but also easy to customize with different flavors of frosting or by adding sprinkles for that extra festive touch.
Ingredients
- 1 cup unsalted butter, softened
- 3/4 cup granulated sugar
- 3/4 cup brown sugar, packed
- 1 teaspoon vanilla extract
- 2 large eggs
- 2 1/4 cups all-purpose flour
- 1 teaspoon baking soda
- 1/2 teaspoon salt
- 2 cups chocolate chips
- 1 cup frosting (vanilla or your choice)
Instructions
- Preheat your oven to 350°F (175°C) and line baking sheets with parchment paper.
- In a large bowl, cream together the softened butter, granulated sugar, brown sugar, and vanilla extract until smooth and fluffy.
- Add the eggs one at a time, mixing well after each addition.
- In another bowl, whisk together the flour, baking soda, and salt. Gradually add this mixture to the wet ingredients, stirring until combined. Fold in the chocolate chips.
- Drop rounded tablespoons of dough onto the prepared baking sheets, spacing them about 2 inches apart.
- Bake for 10-12 minutes, or until the edges are golden brown. Let them cool on the baking sheets for a few minutes before transferring them to a wire rack to cool completely.
- Once the cookies are cool, spread frosting on the flat side of one cookie and top with another cookie to create a sandwich. Repeat with the remaining cookies.
Oreo Truffle Balls with Baby Blue Drizzle
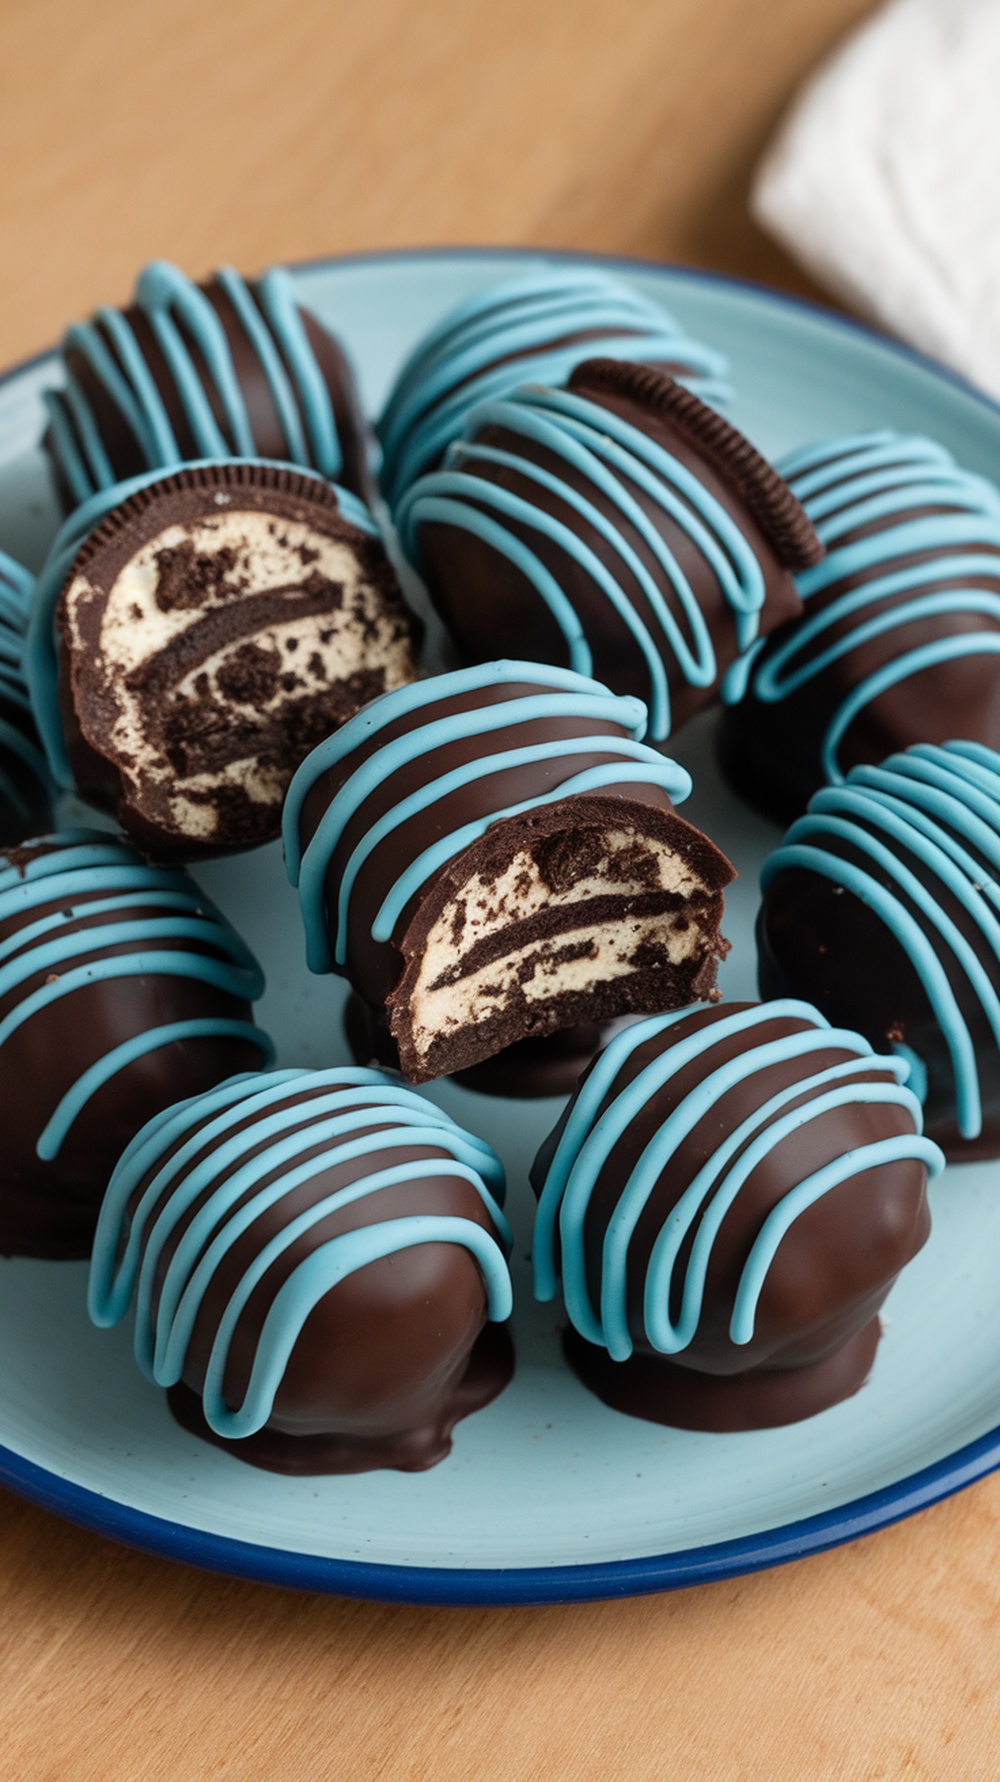
Oreo truffle balls are a simple yet delicious treat perfect for baby showers. They combine the classic taste of Oreos with cream cheese, creating a rich and creamy center. Coated with chocolate and drizzled with a charming baby blue icing, these truffles not only taste amazing but also look delightful on any dessert table.
Making these treats is a breeze. With just a few ingredients and minimal time, you can whip up a batch that will impress your guests. The combination of crunchy, creamy, and sweet flavors will surely be a hit at your celebration!
Ingredients
- 1 package (15.35 oz) Oreo cookies
- 8 oz cream cheese, softened
- 2 cups semi-sweet chocolate chips
- 1 tablespoon vegetable oil
- 1/2 cup melting candy in baby blue
Instructions
- Crush the Oreos: In a food processor, blend the Oreo cookies until they turn into fine crumbs. Transfer the crumbs to a bowl and mix in the softened cream cheese until fully combined.
- Form the Balls: Scoop out small portions of the mixture and roll them into balls. Place them on a baking sheet lined with parchment paper.
- Chill: Refrigerate the truffle balls for about 30 minutes to firm up.
- Melt the Chocolate: In a microwave-safe bowl, melt the semi-sweet chocolate chips with vegetable oil until smooth, stirring every 30 seconds.
- Coat the Truffles: Dip each chilled ball into the melted chocolate, ensuring they are fully coated. Return them to the parchment-lined baking sheet.
- Drizzle: Melt the baby blue candy coating and drizzle it over the chocolate-coated truffles for a charming finish. Let them set at room temperature or refrigerate until firm.
- Serve: Enjoy these delightful Oreo truffle balls at your baby shower and watch them disappear!
Banana Bread Mini Loaves with Nuts
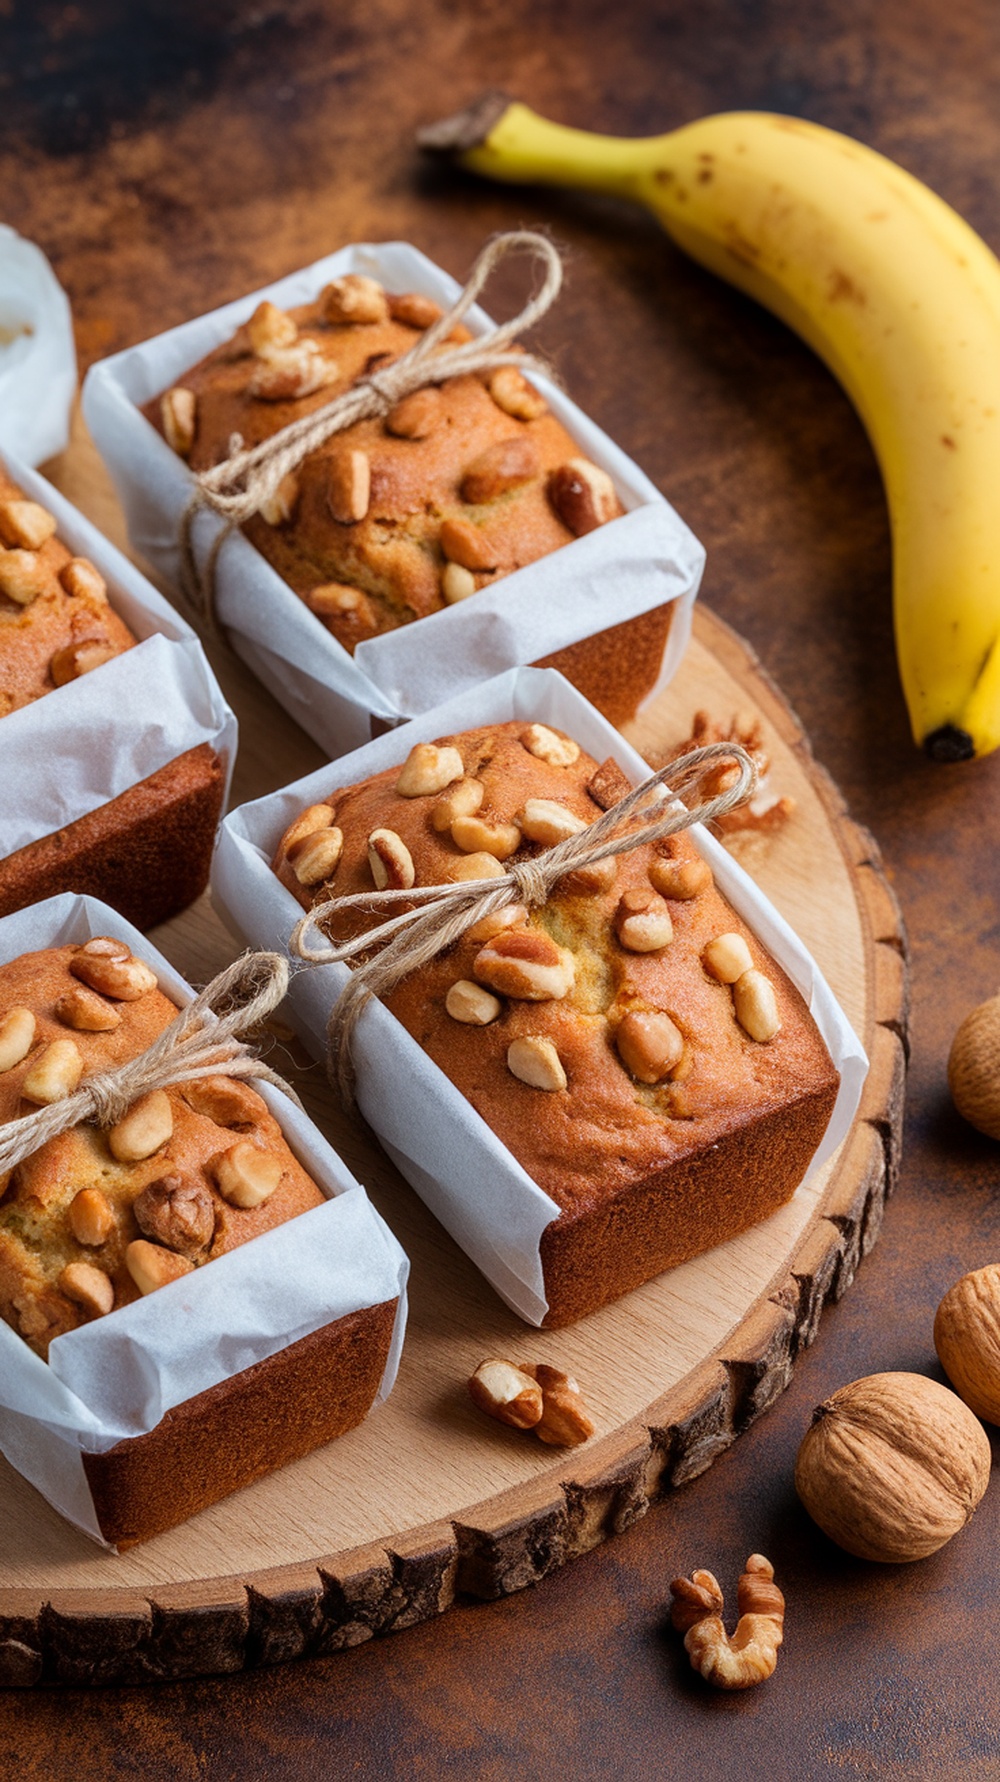
Banana bread mini loaves are a delightful treat that combines the natural sweetness of ripe bananas with a satisfying crunch from nuts. These tiny loaves are perfect for sharing at a baby shower or any gathering. They’re simple to make and can be easily wrapped for guests to take home!
Each bite is moist and flavorful, with the bananas adding a soft texture and the nuts providing that extra bit of crunch. This recipe is not only easy to whip up, but it also fills your kitchen with a warm and inviting aroma as they bake. Perfectly portioned, these mini loaves are sure to impress your guests!
Ingredients
- 3 ripe bananas, mashed
- 1/3 cup melted butter
- 1 teaspoon baking soda
- Pinch of salt
- 3/4 cup sugar
- 1 large egg, beaten
- 1 teaspoon vanilla extract
- 1 cup all-purpose flour
- 1/2 cup chopped nuts (walnuts or pecans)
Instructions
- Preheat your oven to 350°F (175°C) and grease a mini loaf pan.
- In a large mixing bowl, combine the mashed bananas with the melted butter, mixing until well blended.
- Add in the baking soda and salt, then stir in the sugar, beaten egg, and vanilla extract.
- Mix in the flour until just combined, then fold in the chopped nuts.
- Pour the batter evenly into the mini loaf pan and smooth the tops.
- Bake for 20-25 minutes, or until a toothpick comes out clean when inserted into the center of the loaves.
- Let them cool in the pan for a few minutes before transferring to a wire rack to cool completely.
Coconut Cream Pie Cups with Toasted Flakes
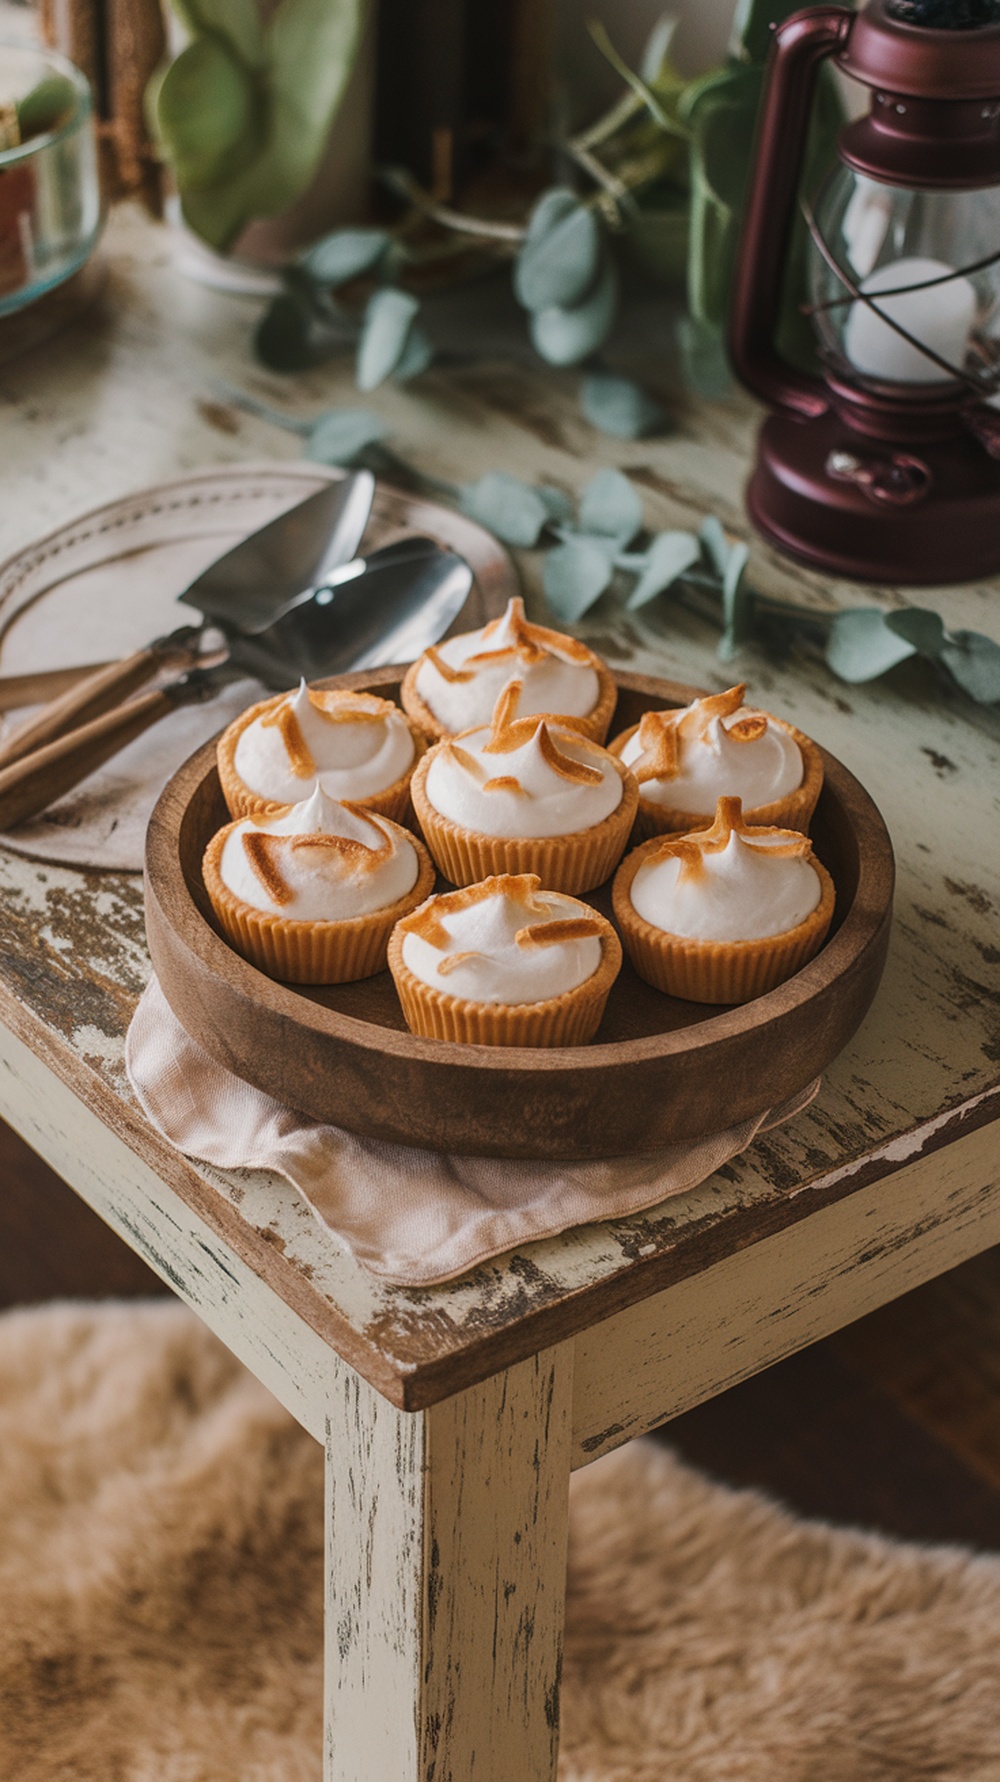
Coconut Cream Pie Cups are a delightful bite-sized treat that combines creamy coconut filling with a flaky crust, making them a hit at any baby shower. These little cups are not only delicious but also incredibly easy to whip up, ensuring that even novice bakers can impress their guests. The sweet, tropical flavor of coconut paired with a light, airy whipped topping creates a refreshing dessert that will leave everyone wanting more.
The toasted coconut flakes on top add a lovely crunch and beautiful presentation, making these cups as pleasing to the eye as they are to the palate. Whether you’re preparing for a baby shower or just looking for a fun dessert to enjoy, these Coconut Cream Pie Cups are sure to be a crowd-pleaser!
Ingredients
- 1 ½ cups graham cracker crumbs
- ½ cup unsalted butter, melted
- 2 cups coconut milk
- ⅓ cup granulated sugar
- ¼ cup cornstarch
- 1 teaspoon vanilla extract
- 1 cup heavy cream
- 2 tablespoons powdered sugar
- ½ cup sweetened shredded coconut, toasted
Instructions
- Preheat the oven to 350°F (175°C). In a bowl, mix graham cracker crumbs with melted butter until well combined. Press the mixture into the bottoms of mini cupcake liners to form a crust.
- Bake the crusts for about 8-10 minutes until golden. Remove from the oven and let cool.
- In a saucepan over medium heat, whisk together coconut milk, sugar, cornstarch, and vanilla extract. Stir constantly until the mixture thickens and bubbles, about 5-7 minutes. Remove from heat and let cool slightly.
- Once cooled, spoon the coconut filling into the crusts. Refrigerate for at least 2 hours to set.
- Before serving, whip the heavy cream with powdered sugar until soft peaks form. Top each cup with whipped cream and sprinkle with toasted coconut flakes.
Creamy Cheesecake Bites with Fruit Topping
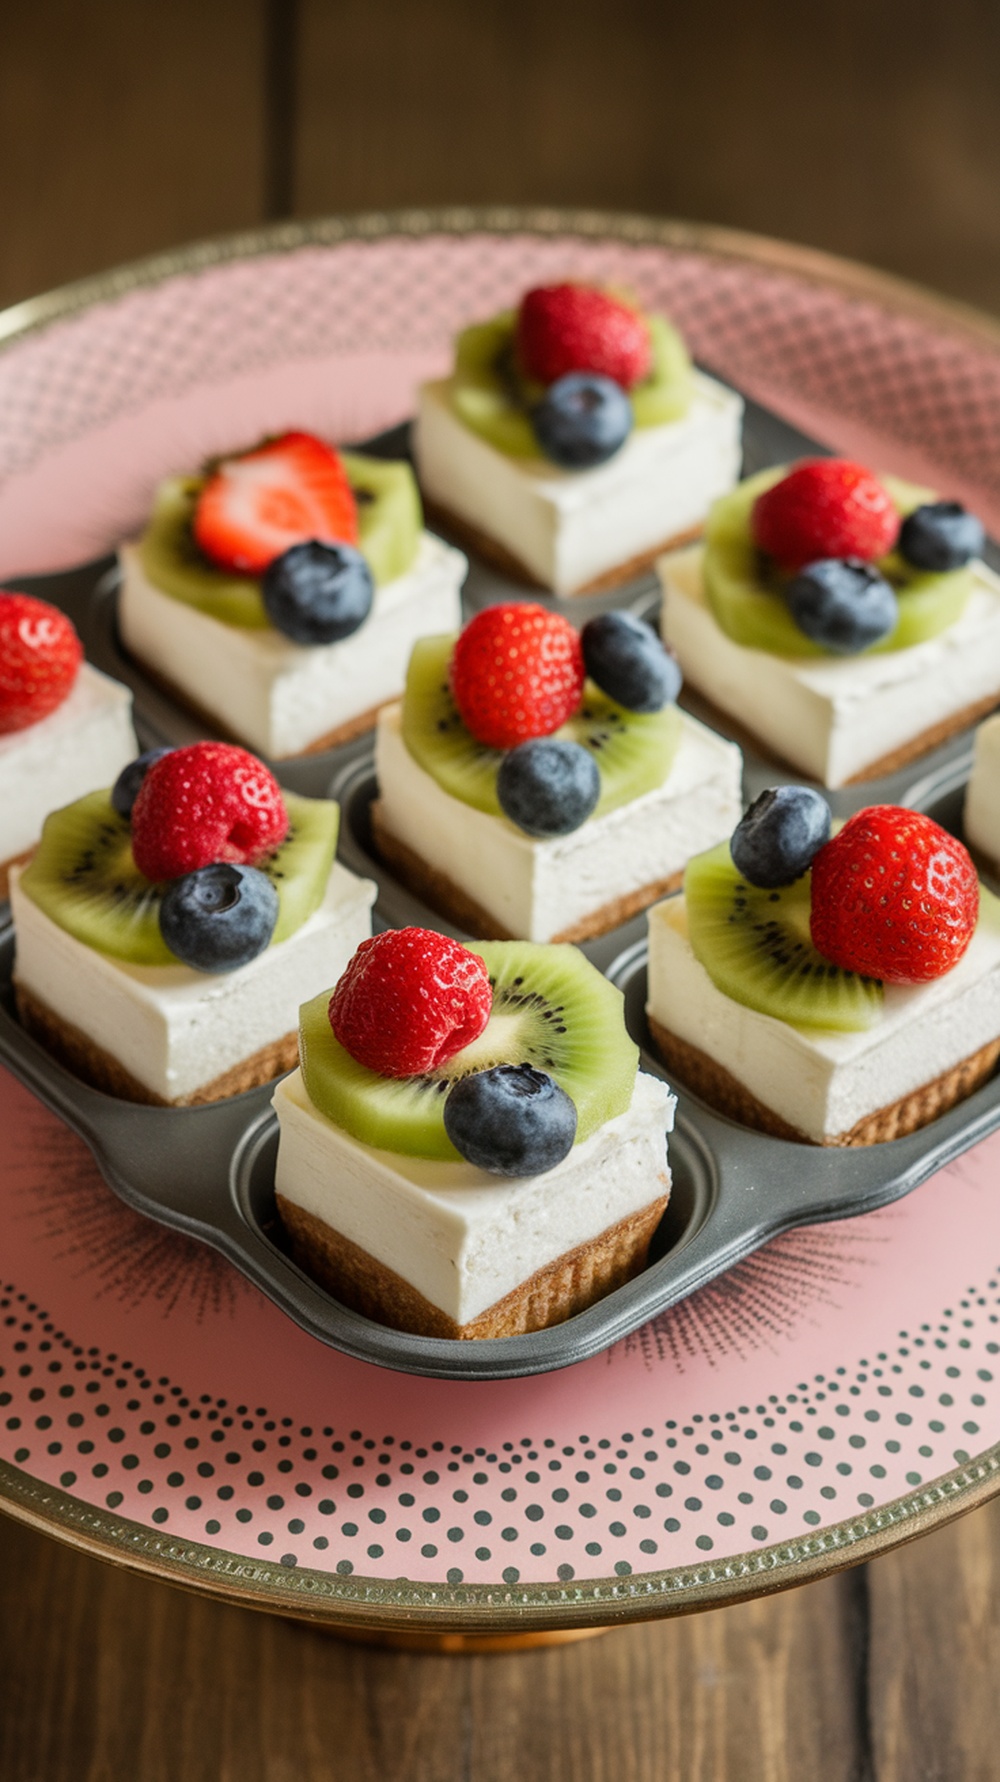
These creamy cheesecake bites are perfect for a baby shower. They offer a smooth and velvety texture balanced with a delightful crunch from the crust. Topped with fresh fruit, they not only look gorgeous but also provide a refreshing burst of flavor that complements the rich cheesecake.
Making these bites is straightforward, so you don’t need to be a pro in the kitchen to impress your guests. They are ideal for serving in small portions, making them a fun and easy dessert option for any celebration.
Ingredients
- 1 cup graham cracker crumbs
- 1/2 cup unsalted butter, melted
- 1 cup cream cheese, softened
- 1/2 cup powdered sugar
- 1 teaspoon vanilla extract
- 1/2 cup whipped cream
- 1 cup assorted fresh fruits (strawberries, blueberries, kiwi, etc.)
Instructions
- Prep the Crust: Preheat your oven to 350°F (175°C). In a bowl, combine graham cracker crumbs and melted butter. Press the mixture into the bottom of a greased mini muffin tin to create a crust.
- Bake the Crust: Bake the crusts for about 5 minutes, then remove and let cool.
- Make the Cheesecake Filling: In another bowl, beat the cream cheese, powdered sugar, and vanilla extract until smooth. Gently fold in the whipped cream.
- Fill the Crusts: Spoon the cheesecake mixture into the cooled crusts, spreading it evenly.
- Chill: Refrigerate the cheesecake bites for at least 2 hours to set.
- Top with Fruit: Before serving, top each cheesecake bite with assorted fresh fruits.
Pineapple Upside Down Mini Cakes
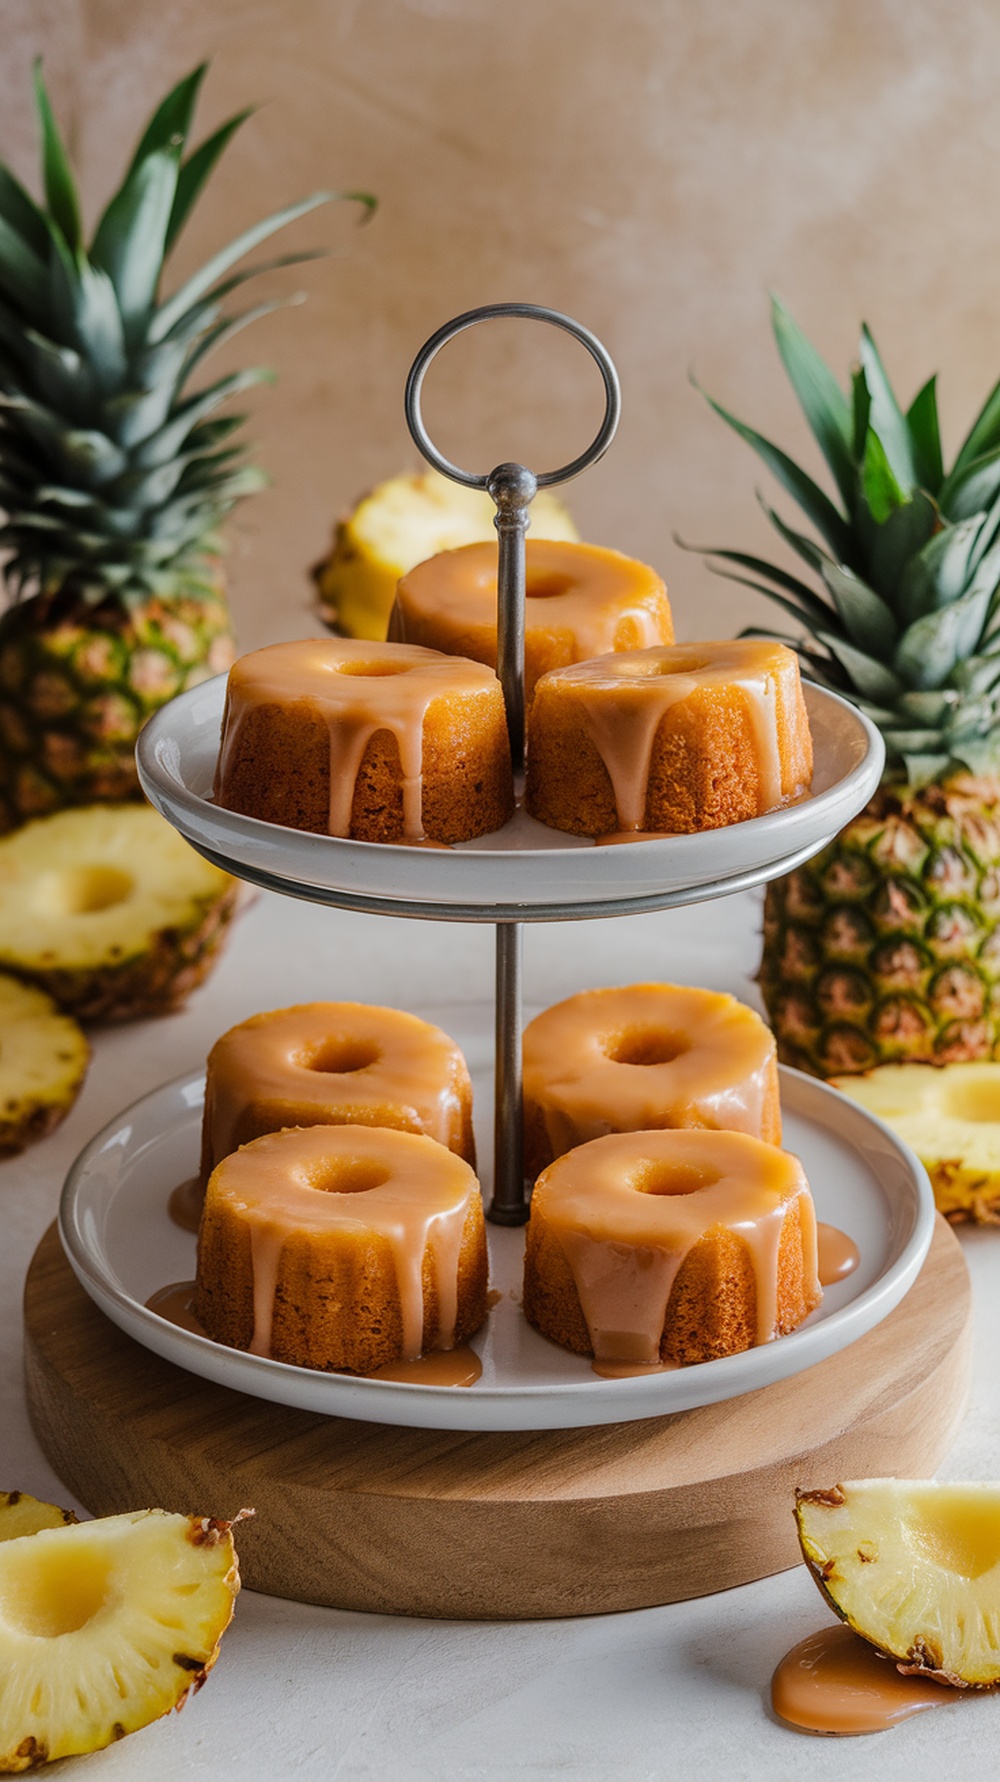
Pineapple upside down mini cakes are a delightful twist on the classic dessert, perfect for baby showers. These charming little cakes are soft, moist, and bursting with the sweet and tangy flavor of pineapple. Topped with a rich caramel glaze, they are not only visually appealing but also incredibly easy to make, making them a hit for any gathering.
The combination of buttery cake with caramelized pineapple creates a flavor that is both nostalgic and refreshing. Whether you’re baking for a celebration or just to satisfy a sweet tooth, these mini delights are sure to impress your guests!
Ingredients
- 1 cup all-purpose flour
- 1/2 cup granulated sugar
- 1/2 cup unsalted butter, softened
- 2 large eggs
- 1/2 cup crushed pineapple, drained
- 1 teaspoon baking powder
- 1/2 teaspoon vanilla extract
- 1/4 teaspoon salt
- 1/2 cup brown sugar, packed
- 1/4 cup pineapple juice
Instructions
- Preheat your oven to 350°F (175°C) and grease a mini bundt cake pan.
- In a mixing bowl, cream together the softened butter and granulated sugar until light and fluffy. Add in the eggs one at a time, mixing well after each addition.
- In another bowl, whisk together the flour, baking powder, and salt. Gradually add this dry mixture to the wet ingredients, alternating with the crushed pineapple and vanilla extract, until combined.
- In a small saucepan, melt the brown sugar and pineapple juice together until bubbly. Pour this mixture into the bottom of the prepared bundt pan.
- Spoon the cake batter over the caramel mixture, filling each mold about two-thirds full. Bake for 20-25 minutes or until a toothpick inserted into the center comes out clean.
- Allow the cakes to cool in the pan for a few minutes before inverting them onto a wire rack to cool completely. Serve with a drizzle of additional caramel sauce if desired!
Strawberry Shortcake Jars with Cream
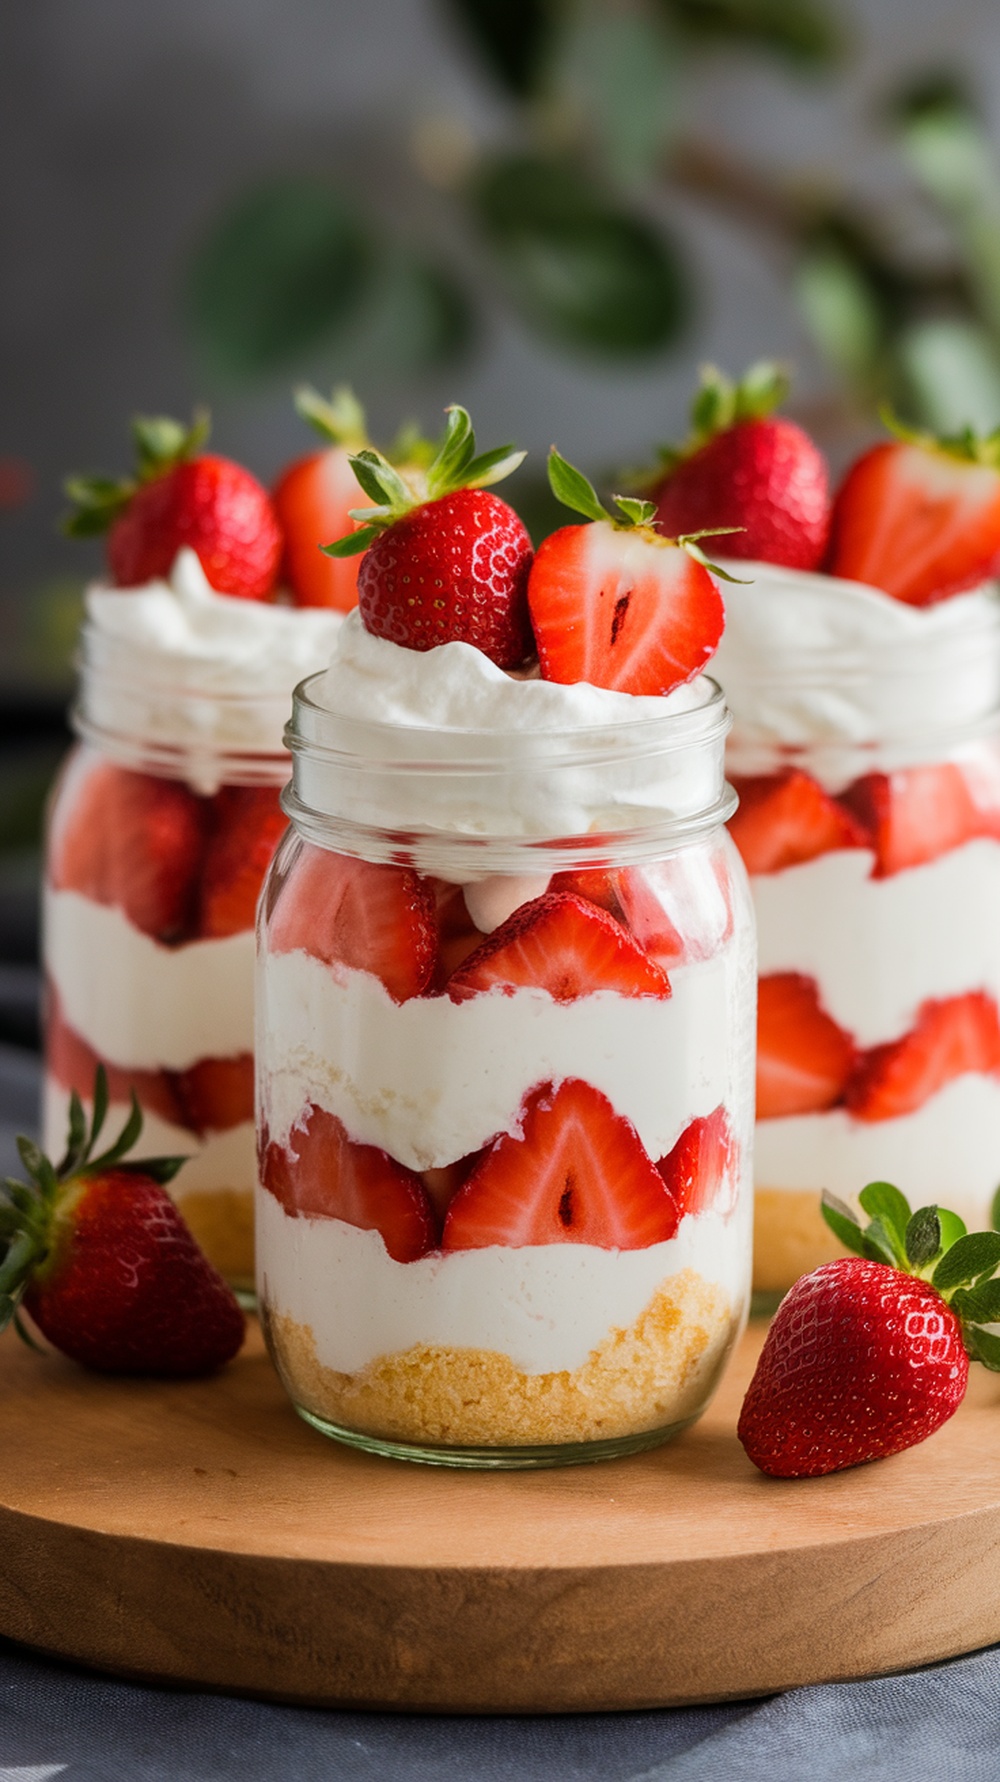
Strawberry shortcake jars are a delightful treat that brings a burst of freshness to any baby shower. These individual servings combine layers of fluffy cake, sweet strawberries, and rich whipped cream, making them not only tasty but also visually appealing. They are simple to prepare and perfect for serving guests who want that classic dessert flavor without the fuss of cutting slices.
The sweet and juicy strawberries pair wonderfully with the light creaminess, creating a dessert that’s both comforting and refreshing. Plus, assembling these jars is quick, allowing you more time to enjoy the celebration. Give them a try for your next gathering!
Ingredients
- 2 cups fresh strawberries, hulled and sliced
- 1 cup heavy whipping cream
- 2 tablespoons powdered sugar
- 1 teaspoon vanilla extract
- 1 cup pound cake, cut into cubes (store-bought or homemade)
- Mint leaves for garnish (optional)
Instructions
- Prepare the Whipped Cream: In a mixing bowl, beat the heavy cream, powdered sugar, and vanilla extract until soft peaks form. Set aside.
- Layer the Ingredients: In small jars or glasses, start by adding a layer of pound cake cubes at the bottom. Next, add a layer of sliced strawberries followed by a generous dollop of whipped cream.
- Repeat Layers: Continue layering with cake, strawberries, and whipped cream until the jars are filled, finishing with whipped cream on top.
- Garnish: Top with a few extra strawberry slices and mint leaves, if desired. Serve immediately or refrigerate until ready to serve.
Caramel Apple Nachos with Drizzle
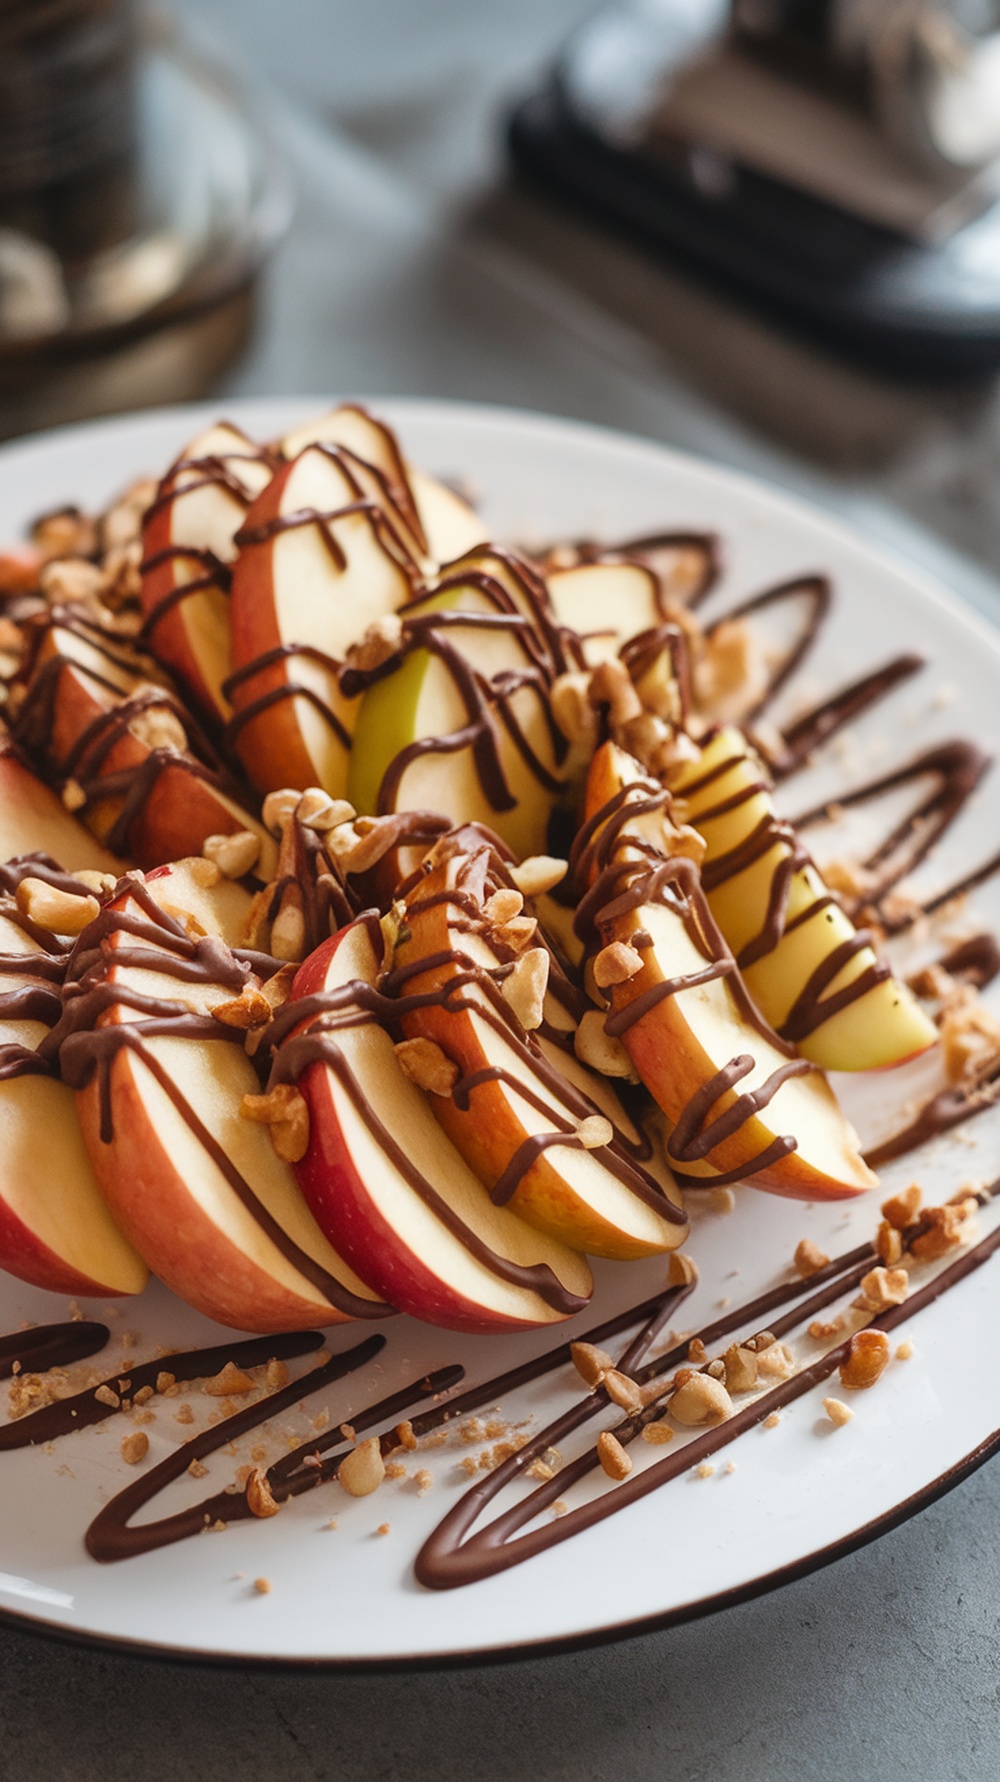
Caramel Apple Nachos are a fun twist on a classic treat, making them perfect for any baby shower. Thinly sliced apples are drizzled with warm caramel and chocolate, topped with crunchy nuts, creating a delightful mix of flavors and textures. This dessert is not only simple to prepare, but it also brings a colorful and playful presentation to the table.
The sweetness of the caramel combined with the tartness of the apples makes every bite a delicious experience. Plus, the addition of chocolate drizzle adds an extra layer of indulgence that guests will love. It’s an easy and interactive dessert that pairs perfectly with baby shower festivities!
Pumpkin Spice Muffins with Cream Cheese Frosting
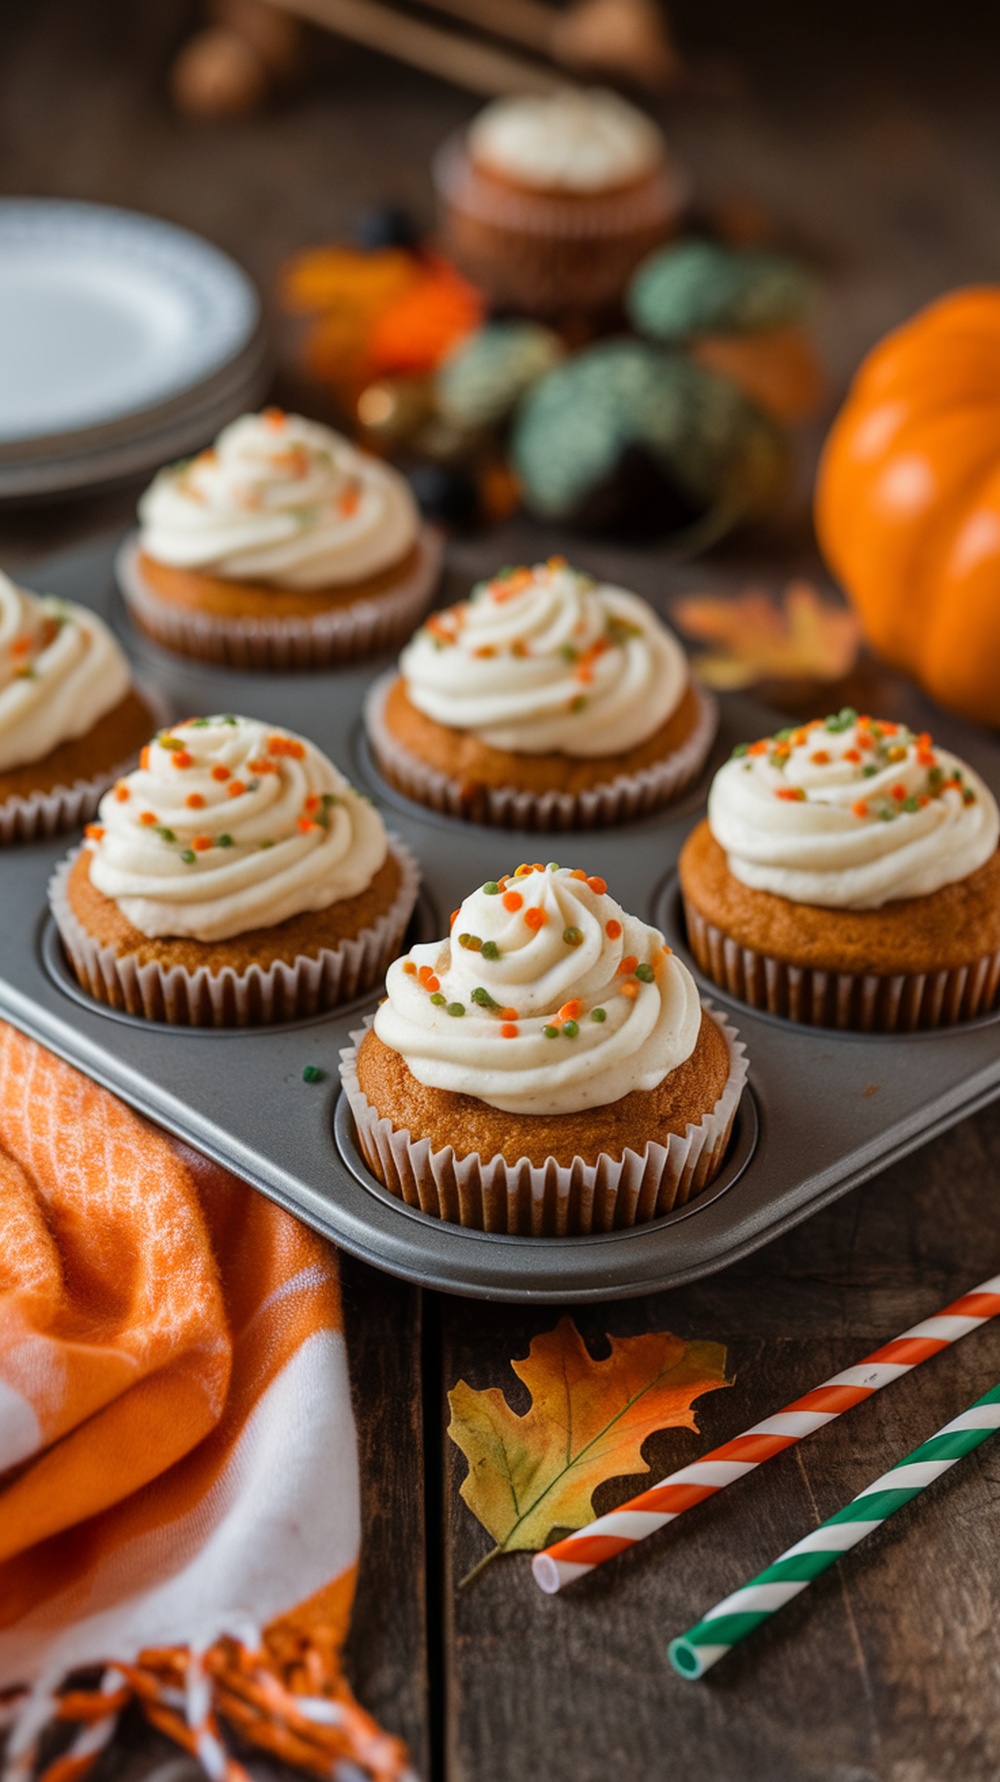
Pumpkin spice muffins are the perfect treat for any baby shower, bringing warmth and cozy flavors that guests will love. These muffins have a moist texture and a delightful pumpkin flavor that’s beautifully complemented by a rich cream cheese frosting. Simple to make, they add a festive touch to your dessert table and are sure to be a crowd-pleaser.
The balance of spices like cinnamon and nutmeg in these muffins creates a comforting taste that evokes autumn vibes. Topped with a creamy, sweet frosting, these muffins become a deliciously inviting dessert option that’s both easy to whip up and hard to resist!
Ingredients
- 1 ½ cups all-purpose flour
- 1 cup granulated sugar
- 1 teaspoon baking soda
- ½ teaspoon baking powder
- ½ teaspoon salt
- 1 teaspoon ground cinnamon
- ½ teaspoon ground nutmeg
- ½ teaspoon ground ginger
- ½ cup vegetable oil
- 1 cup pumpkin puree
- 2 large eggs
- 1 teaspoon vanilla extract
- 1 cup cream cheese, softened
- 2 cups powdered sugar
- 1 teaspoon vanilla extract (for frosting)
Instructions
- Preheat the oven to 350°F (175°C) and line a muffin tin with paper liners.
- In a large bowl, whisk together the flour, sugar, baking soda, baking powder, salt, cinnamon, nutmeg, and ginger until well combined.
- In another bowl, mix the vegetable oil, pumpkin puree, eggs, and vanilla extract until smooth.
- Combine the wet ingredients into the dry ingredients and stir until just combined. Be careful not to overmix.
- Pour the batter into the prepared muffin tin, filling each liner about 2/3 full.
- Bake for 18-20 minutes, or until a toothpick inserted into the center comes out clean. Allow to cool completely on a wire rack.
- While the muffins cool, prepare the cream cheese frosting by beating the cream cheese, powdered sugar, and vanilla extract together until smooth and fluffy.
- Once the muffins are cool, pipe or spread the cream cheese frosting generously on top. Enjoy!
Gummy Bear Fruit Cups for Kids
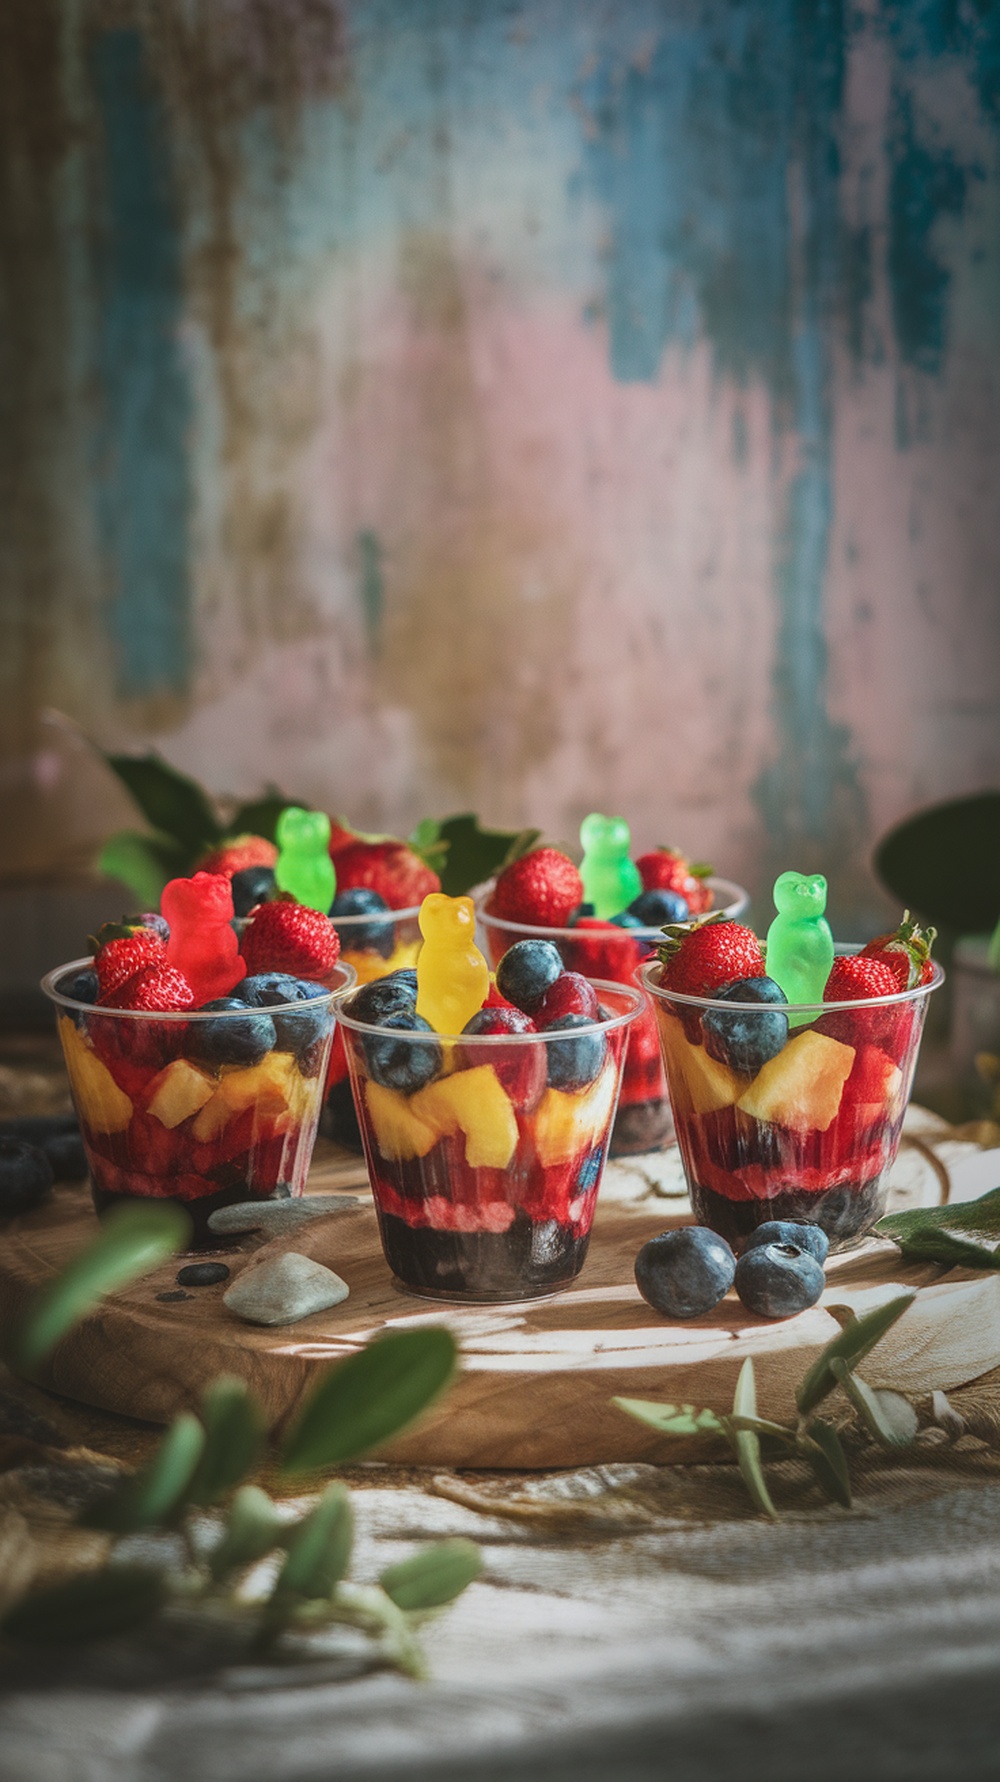
Gummy Bear Fruit Cups are a fun and colorful treat that kids will absolutely love! These cups are a delightful mix of fresh fruits layered with a sweet sauce and topped with gummy bears, making them not only tasty but also visually appealing. They are simple to prepare and can be made in advance, making them perfect for a baby shower or any gathering.
With a burst of fruity flavors and a hint of sweetness from the gummy bears, these cups are sure to bring smiles all around. Plus, you can personalize them with your favorite fruits, making them versatile and adaptable for any occasion!
Ingredients
- 1 cup strawberries, diced
- 1 cup pineapple, diced
- 1 cup blueberries
- 1 cup raspberry or strawberry gelatin
- 1 cup boiling water
- 1/2 cup cold water
- Gummy bears for topping
Instructions
- Prepare the Gelatin: In a bowl, dissolve the gelatin in boiling water. Stir until fully dissolved, then add cold water and mix well.
- Layer the Fruits: In clear cups, layer the diced strawberries, pineapples, and blueberries. Pour the gelatin mixture on top of the fruits until the cups are filled.
- Chill: Place the cups in the refrigerator for about an hour, or until the gelatin is set.
- Add Gummy Bears: Once the gelatin has set, add gummy bears on top of each cup as a fun garnish.
- Serve: Enjoy these vibrant fruit cups as a perfect sweet treat for the little ones!
Chocolate Swirl Brownies with Nuts
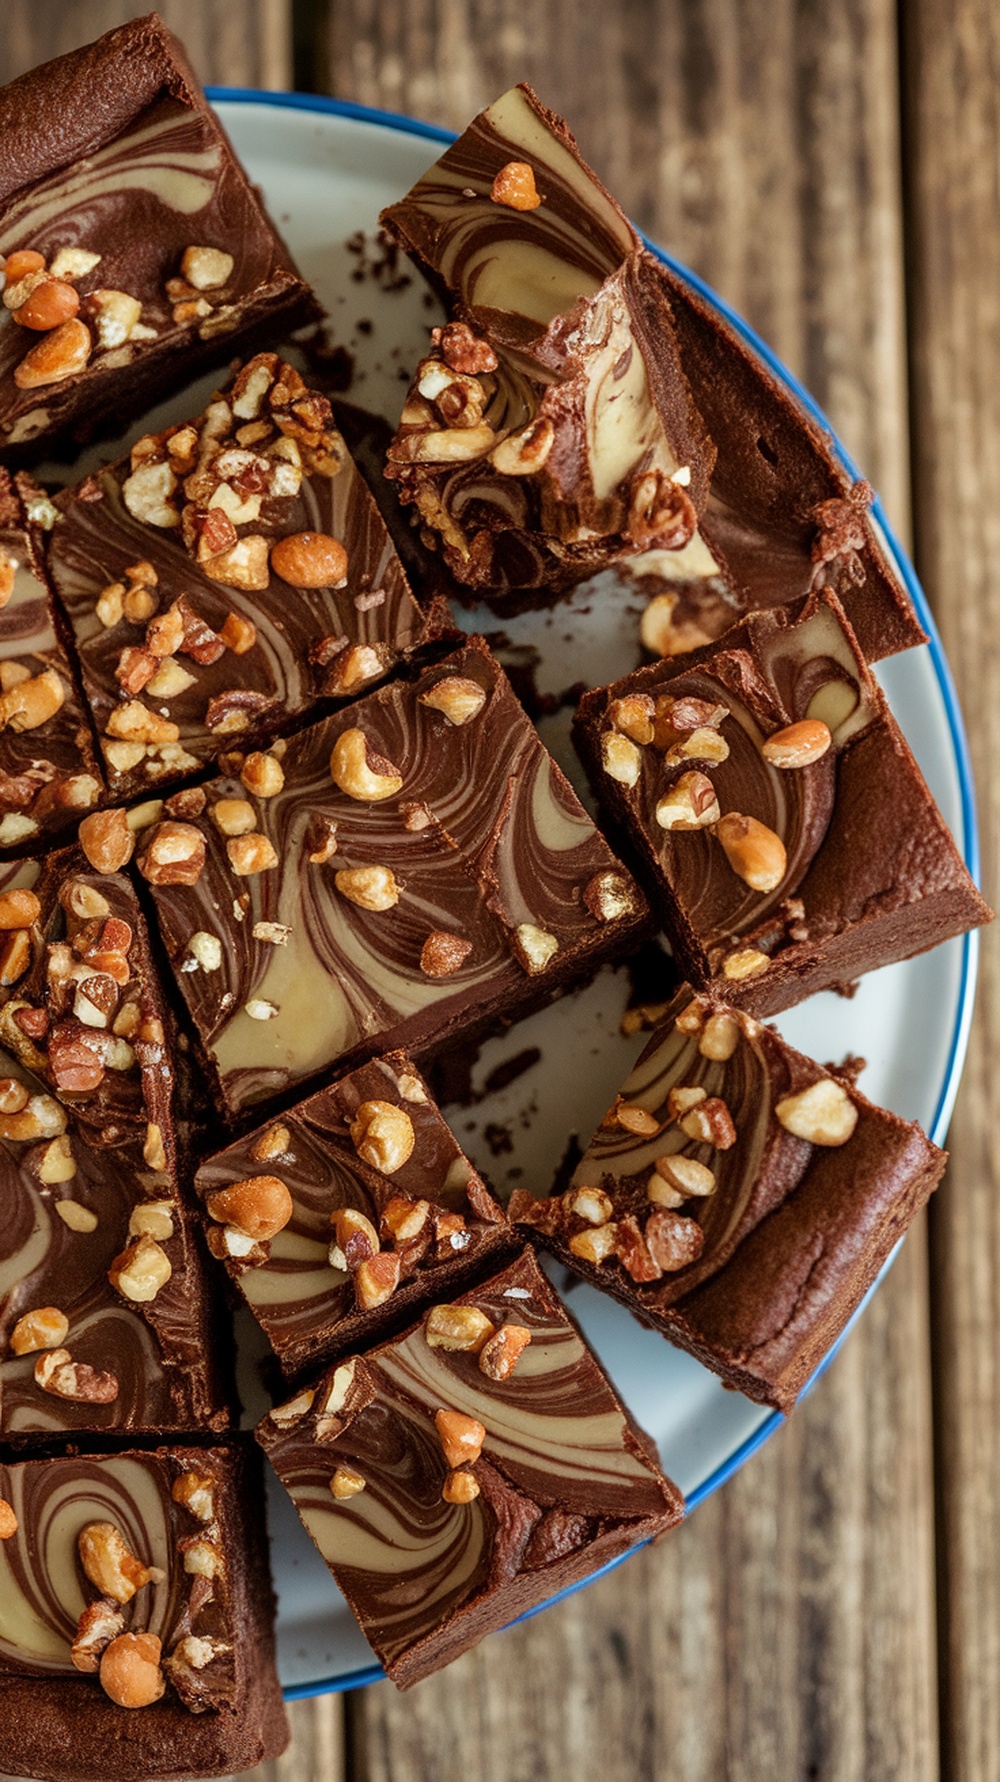
Chocolate swirl brownies with nuts are a delightful treat that perfectly balances rich chocolate flavor with the satisfying crunch of nuts. These brownies are not only delicious but also simple to make, making them a great addition to any baby shower dessert spread. The swirls of chocolate create a beautiful marbled effect, while the nuts add an extra layer of texture and flavor that everyone will love.
Whether you’re hosting a gathering or simply satisfying a sweet tooth, these brownies are sure to impress. They’re perfect for sharing and will likely become a favorite among guests. Plus, the recipe is straightforward, allowing even novice bakers to whip them up with ease!
Meringue Kisses in Pastel Colors
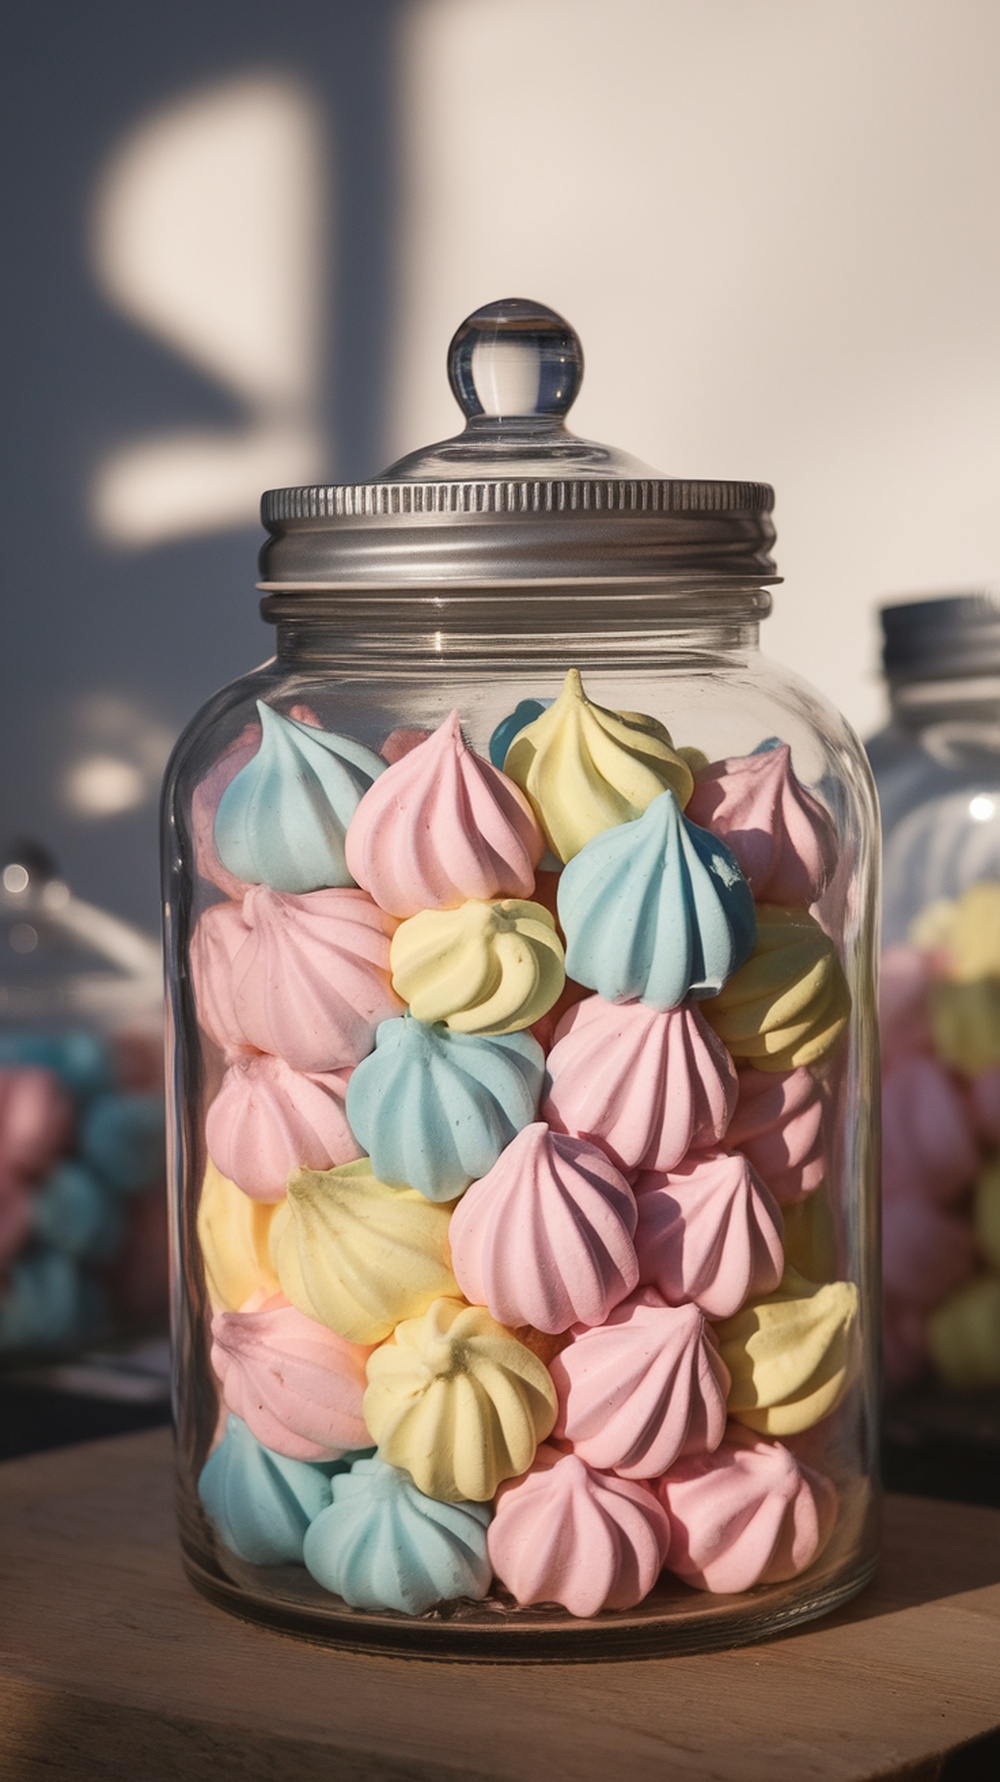
Meringue kisses are delightful little treats that are as fun to make as they are to eat. With their light, airy texture and sweet flavor, they melt in your mouth and are perfect for any baby shower celebration. These charming pastel meringues add a splash of color to your dessert table and are surprisingly simple to whip up.
Once you master the basic technique, you can easily customize these meringue kisses with different colors and flavors. They are naturally gluten-free and can be made with minimal ingredients, making them a hit with guests of all ages.
Ingredients
- 4 large egg whites
- 1 cup granulated sugar
- 1/4 teaspoon cream of tartar
- 1 teaspoon vanilla extract
- Food coloring (pastel shades of your choice)
Instructions
- Preheat your oven to 200°F (93°C) and line two baking sheets with parchment paper.
- In a clean mixing bowl, whisk the egg whites until foamy. Add the cream of tartar and continue to whisk until soft peaks form.
- Gradually add the sugar, one tablespoon at a time, whisking until the mixture is glossy and stiff peaks form. Mix in the vanilla extract.
- Divide the meringue into separate bowls and add a few drops of food coloring to each, gently folding to create swirls.
- Transfer the meringue to piping bags fitted with star tips and pipe small kisses onto the prepared baking sheets.
- Bake for 1.5 to 2 hours until the meringues are dry and easily lift off the parchment paper. Turn off the oven and let them cool inside for another hour.
- Once cooled, serve these sweet meringue kisses at your baby shower or store them in an airtight container for later.
Rice Krispie Treats Shaped Like Baby Bottles
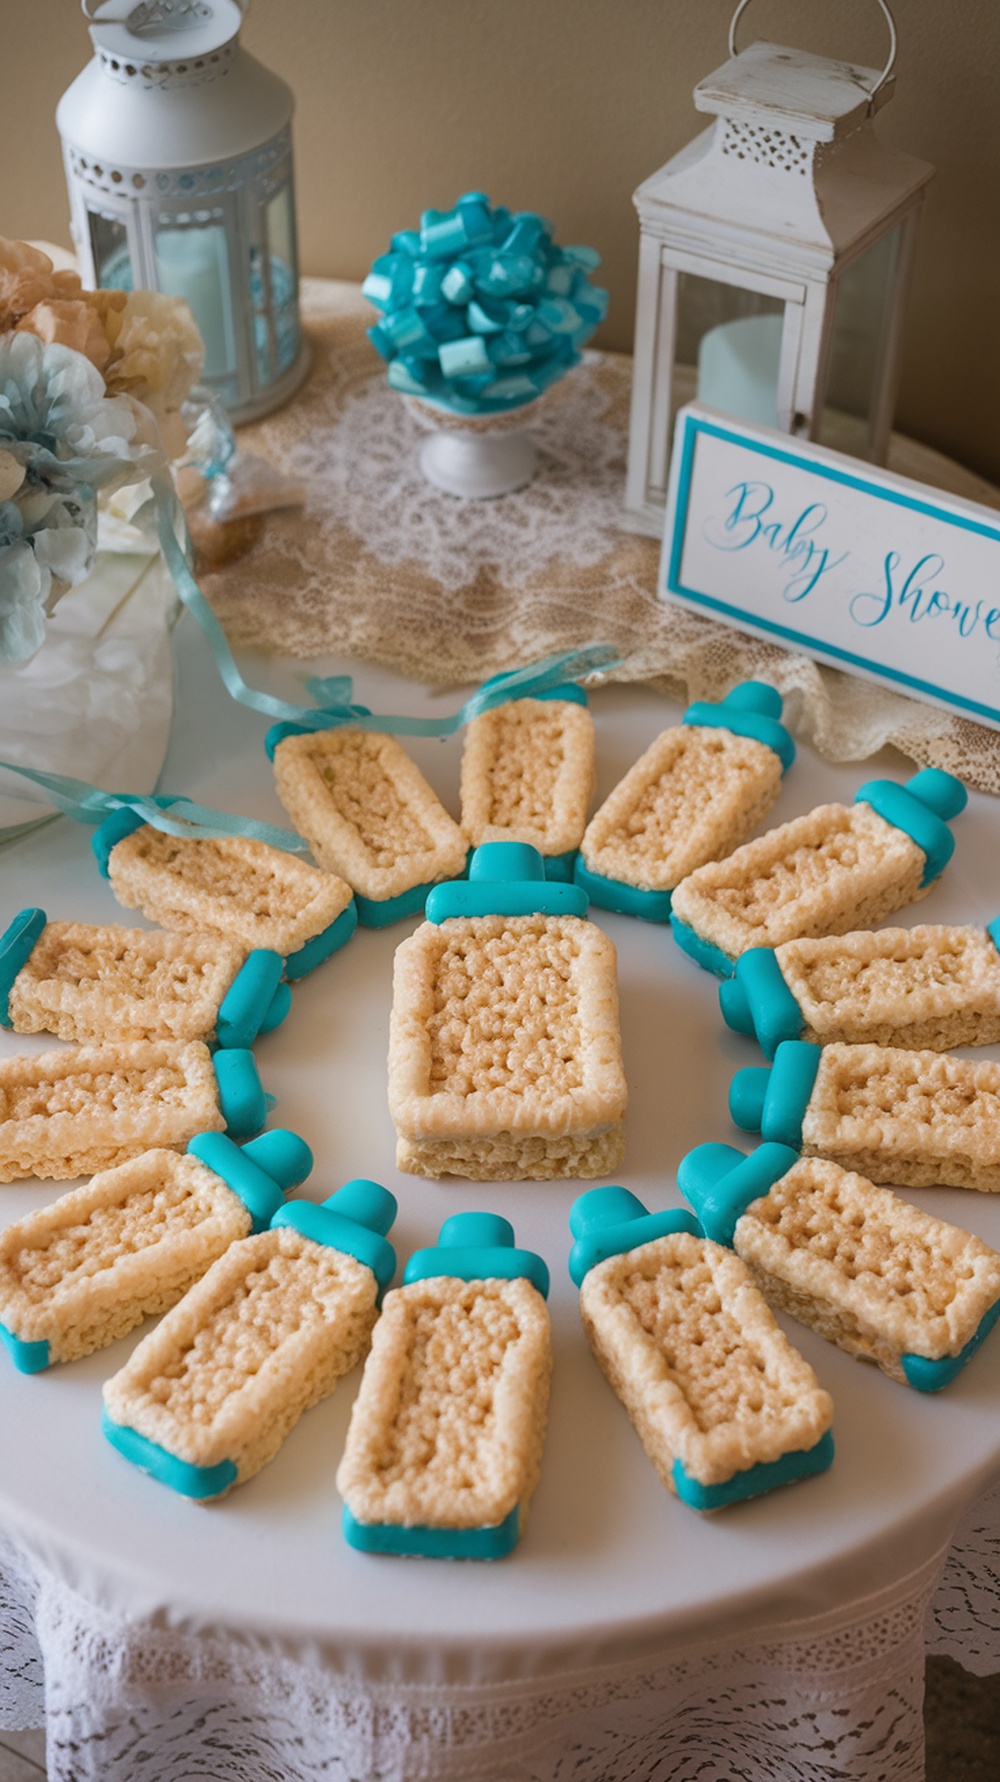
These adorable Rice Krispie treats shaped like baby bottles are a fun and tasty addition to any baby shower. They are sweet, chewy, and have a delightful crunch that will keep everyone coming back for more. Plus, they are super easy to make, making them perfect for both seasoned bakers and kitchen newbies!
The fun shapes and vibrant colors will surely bring smiles to your guests. You can customize them with different colors for the bottle caps or even add sprinkles for extra flair. Let’s get started on creating these charming treats!
Ingredients
- 3 tablespoons unsalted butter
- 1 package (10 oz) mini marshmallows
- 6 cups Rice Krispies cereal
- 2 cups blue candy melts
- 1 tablespoon vegetable oil
Instructions
- Prepare the Pan: Grease a baking dish with butter or cooking spray. Set aside.
- Melt Butter and Marshmallows: In a large saucepan over low heat, melt the butter. Once melted, add the marshmallows, stirring until completely melted and smooth.
- Add Cereal: Remove from heat and stir in the Rice Krispies cereal until well combined. Press the mixture into the prepared baking dish evenly.
- Cool and Cut: Allow the mixture to cool for about 10 minutes. Once cooled, cut into rectangular shapes to form the bottles.
- Melt the Candy: In a microwave-safe bowl, heat the blue candy melts with vegetable oil in 30-second intervals, stirring until smooth.
- Decorate: Dip the top of each Rice Krispie treat into the melted candy, then place them on a parchment-lined baking sheet to set. You can add extra melted candy to create details on the bottle caps if desired.
- Serve: Once the decorations are set, serve these cute baby bottle treats at your baby shower and enjoy!
Peanut Butter Filled Pretzel Bites
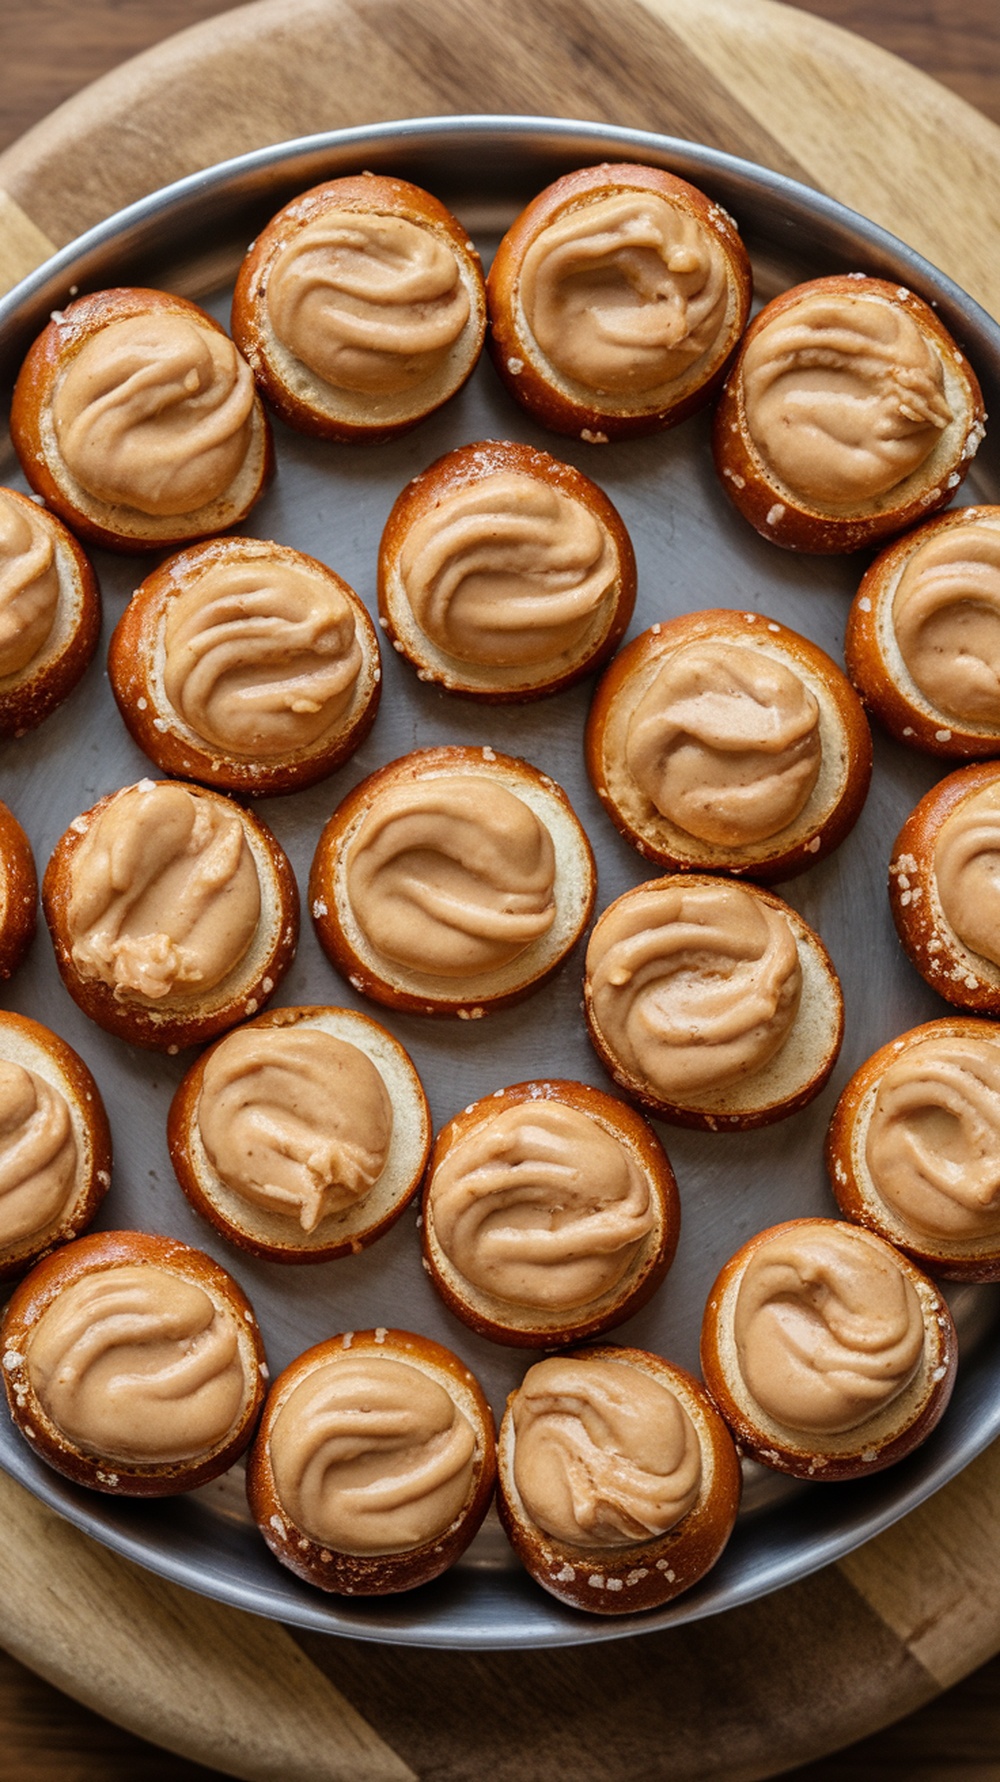
Peanut Butter Filled Pretzel Bites are a delightful treat that combines the crunch of pretzels with the creamy goodness of peanut butter. They have a perfect balance of sweet and salty, making them a crowd-pleaser for any baby shower. Plus, they’re super easy to whip up, requiring minimal ingredients and time!
These bites are not only delicious but also fun to make. Everyone will love the surprise of creamy peanut butter hidden inside the crunchy pretzel exterior. They’re perfect for sharing or for satisfying your own sweet cravings!
Ingredients
- 1 cup creamy peanut butter
- 1/2 cup powdered sugar
- 1/4 cup unsalted butter, softened
- 1 package pretzel bites
- 1 cup chocolate chips (optional, for drizzling)
Instructions
- In a mixing bowl, combine the peanut butter, powdered sugar, and softened butter. Mix until smooth and creamy.
- Take a pretzel bite and fill it with a generous amount of the peanut butter mixture. You can use a piping bag or simply spoon it in.
- Once all pretzel bites are filled, melt the chocolate chips in the microwave or over a double boiler.
- Drizzle the melted chocolate over the filled pretzel bites for an added touch of sweetness, if desired.
- Let them set for a few minutes before serving. Enjoy your tasty treats!
Yellow Cake with Buttercream Frosting
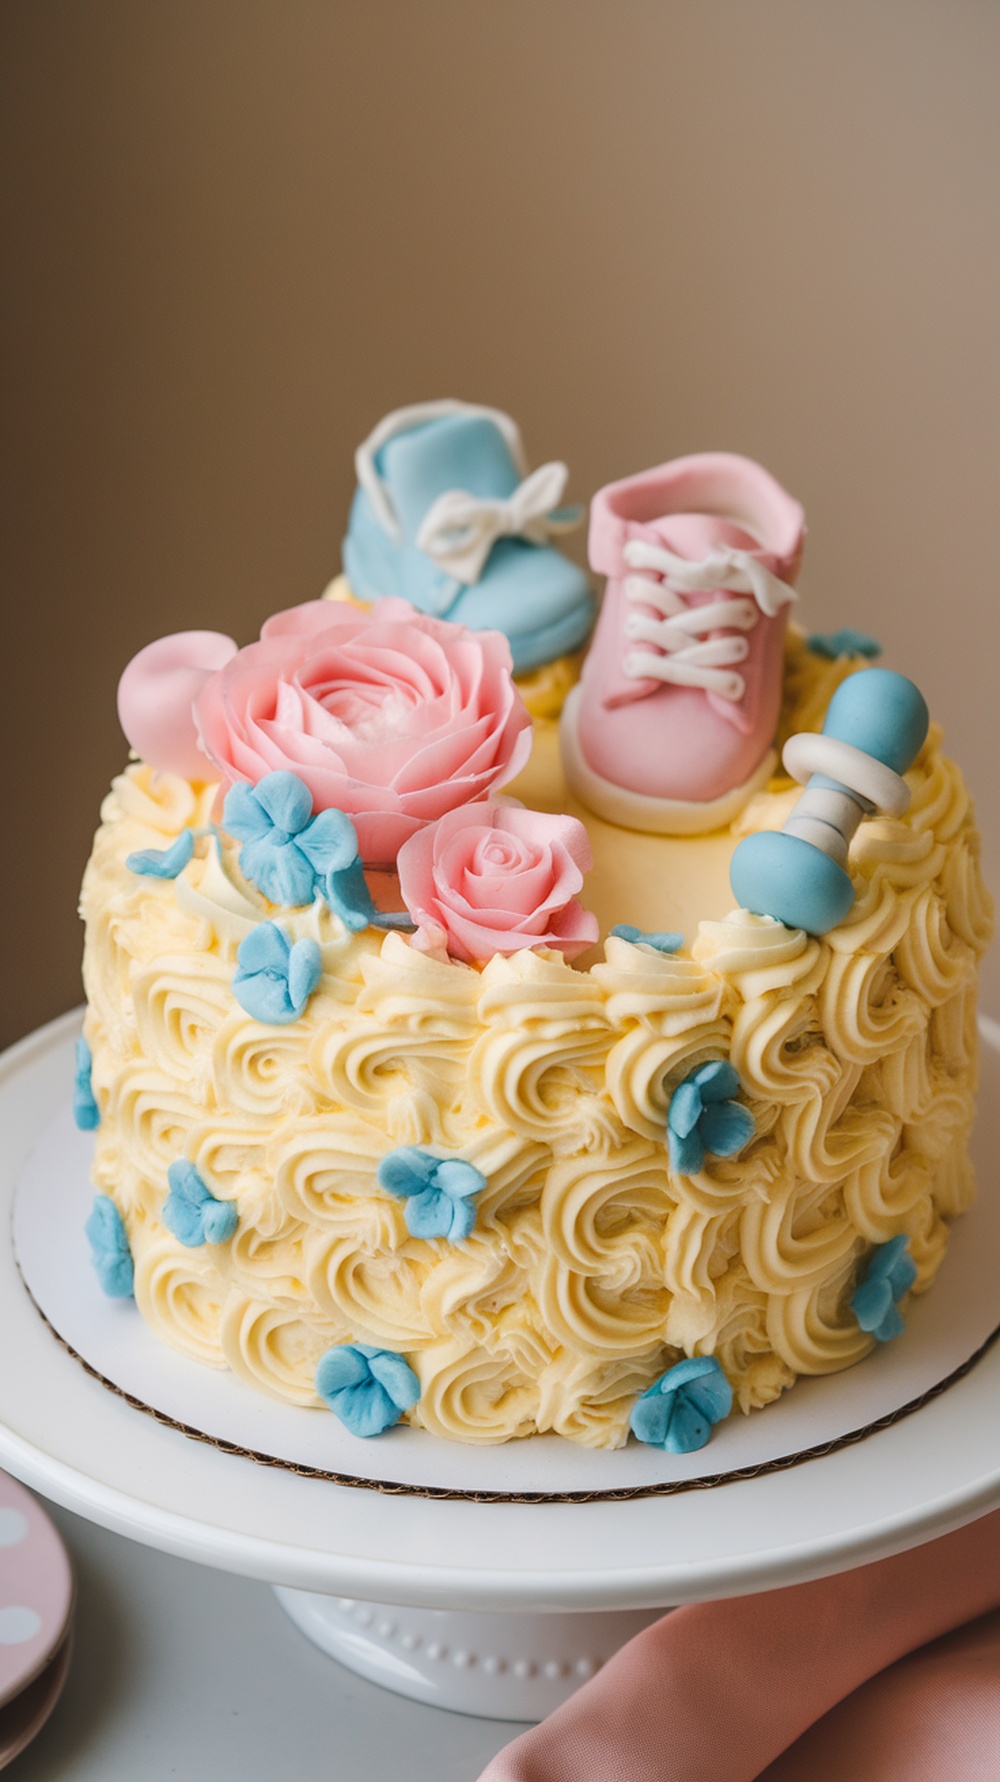
This yellow cake with buttercream frosting is a delightful treat perfect for any baby shower. It’s simple to make, with a moist and tender crumb that pairs beautifully with the creamy frosting. The sweetness of the cake balances well with the rich buttercream, creating a dessert that everyone will love.
Not only is this cake easy to whip up, but it’s also customizable. You can add your favorite flavors or decorations to make it unique for the occasion. This classic dessert is sure to be a hit among guests, making it a great choice for celebrating new beginnings!
Ingredients
- 2 cups all-purpose flour
- 1 1/2 cups granulated sugar
- 1/2 cup unsalted butter, softened
- 1 cup milk
- 3 1/2 teaspoons baking powder
- 1 teaspoon vanilla extract
- 1/2 teaspoon salt
- 3 large eggs
- 4 cups powdered sugar
- 1 cup unsalted butter, softened
- 1 teaspoon vanilla extract
- 2-4 tablespoons milk
Instructions
- Preheat your oven to 350°F (175°C) and grease two 9-inch round cake pans.
- In a large bowl, cream together the softened butter and granulated sugar until light and fluffy. Add the eggs one at a time, mixing well after each addition, then stir in the vanilla.
- In a separate bowl, combine the flour, baking powder, and salt. Gradually add this dry mixture to the wet ingredients, alternating with the milk. Mix until just combined.
- Divide the batter evenly between the prepared cake pans and smooth the tops. Bake for 25-30 minutes, or until a toothpick inserted into the center comes out clean. Allow the cakes to cool in the pans for about 10 minutes, then transfer to wire racks to cool completely.
- To make the buttercream frosting, beat the softened butter until creamy. Gradually add the powdered sugar and mix until combined. Then, add the vanilla and enough milk to reach your desired consistency.
- Frost the cooled cakes with the buttercream, layering them on top of each other. Decorate as desired, and serve at your baby shower!
Chocolate Mousse Cups with Berry Garnish
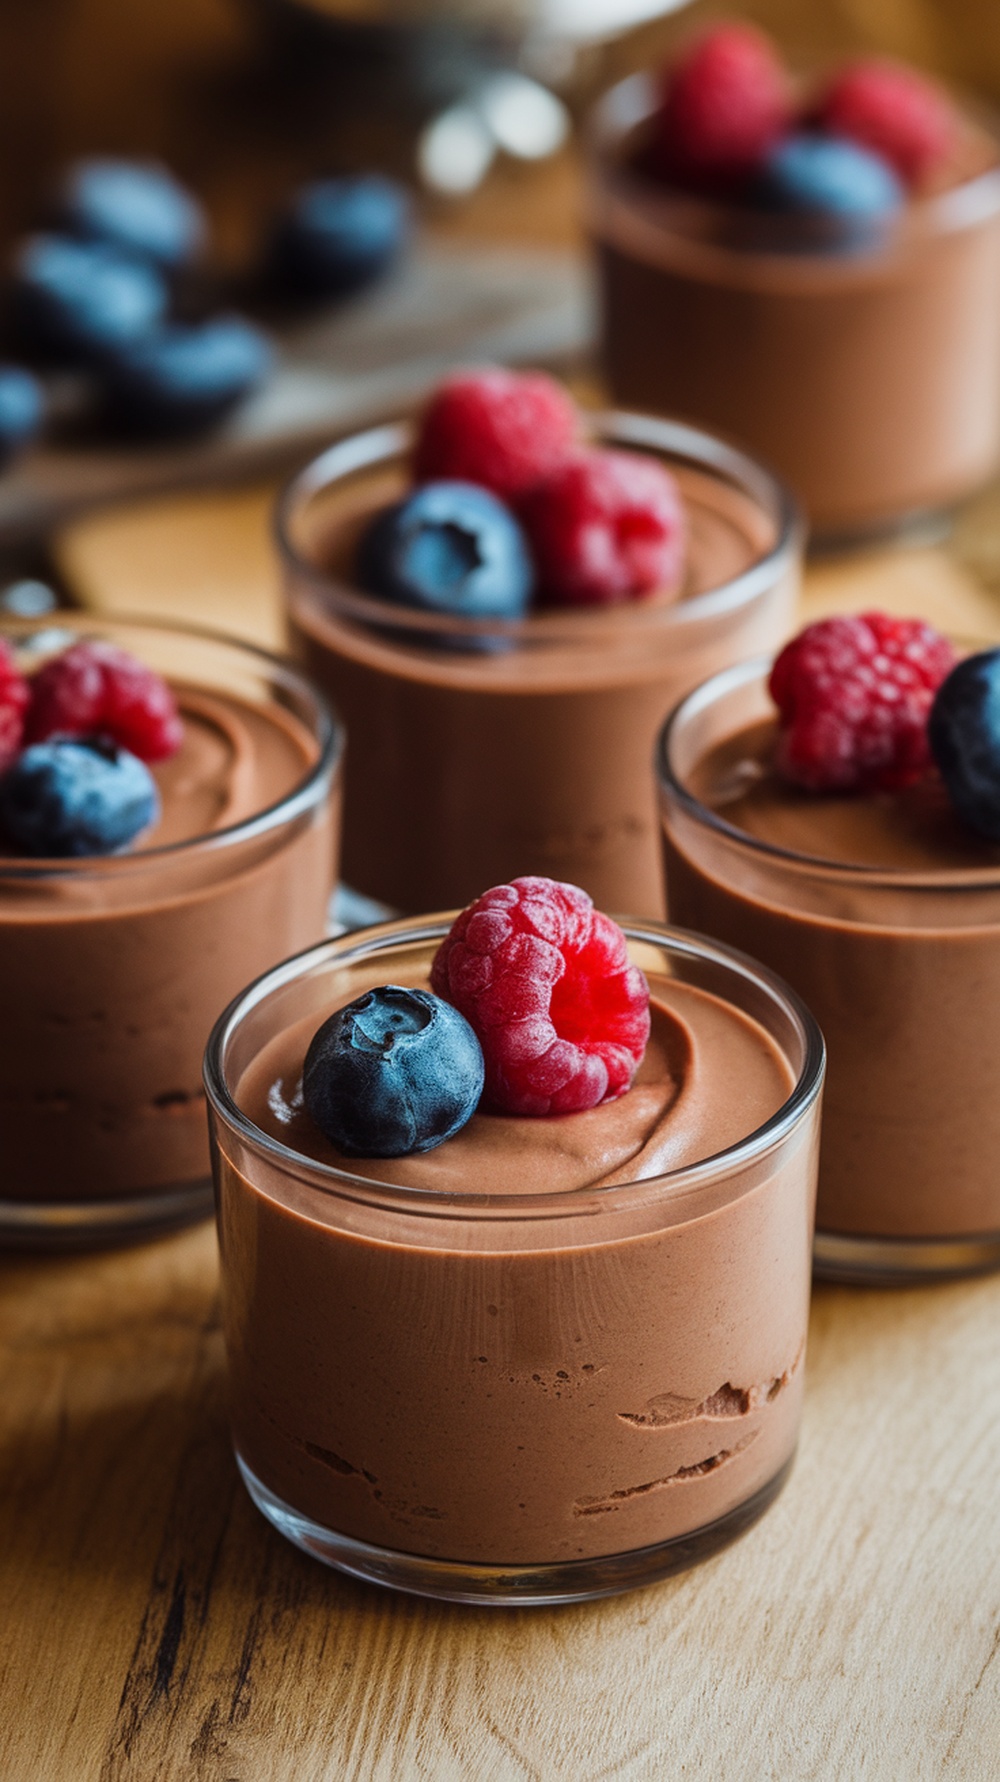
Chocolate mousse cups are a delightful treat that everyone will love. They offer a rich, creamy chocolate flavor that melts in your mouth, making them a perfect choice for a baby shower dessert. Plus, they’re easy to whip up, requiring just a few simple ingredients and minimal time to prepare.
The addition of fresh berries on top not only adds a pop of color but also a burst of freshness that complements the smoothness of the mousse. These individual servings are not only visually appealing but also perfect for portion control at your celebration.
Fruit Tarts with Colorful Glaze
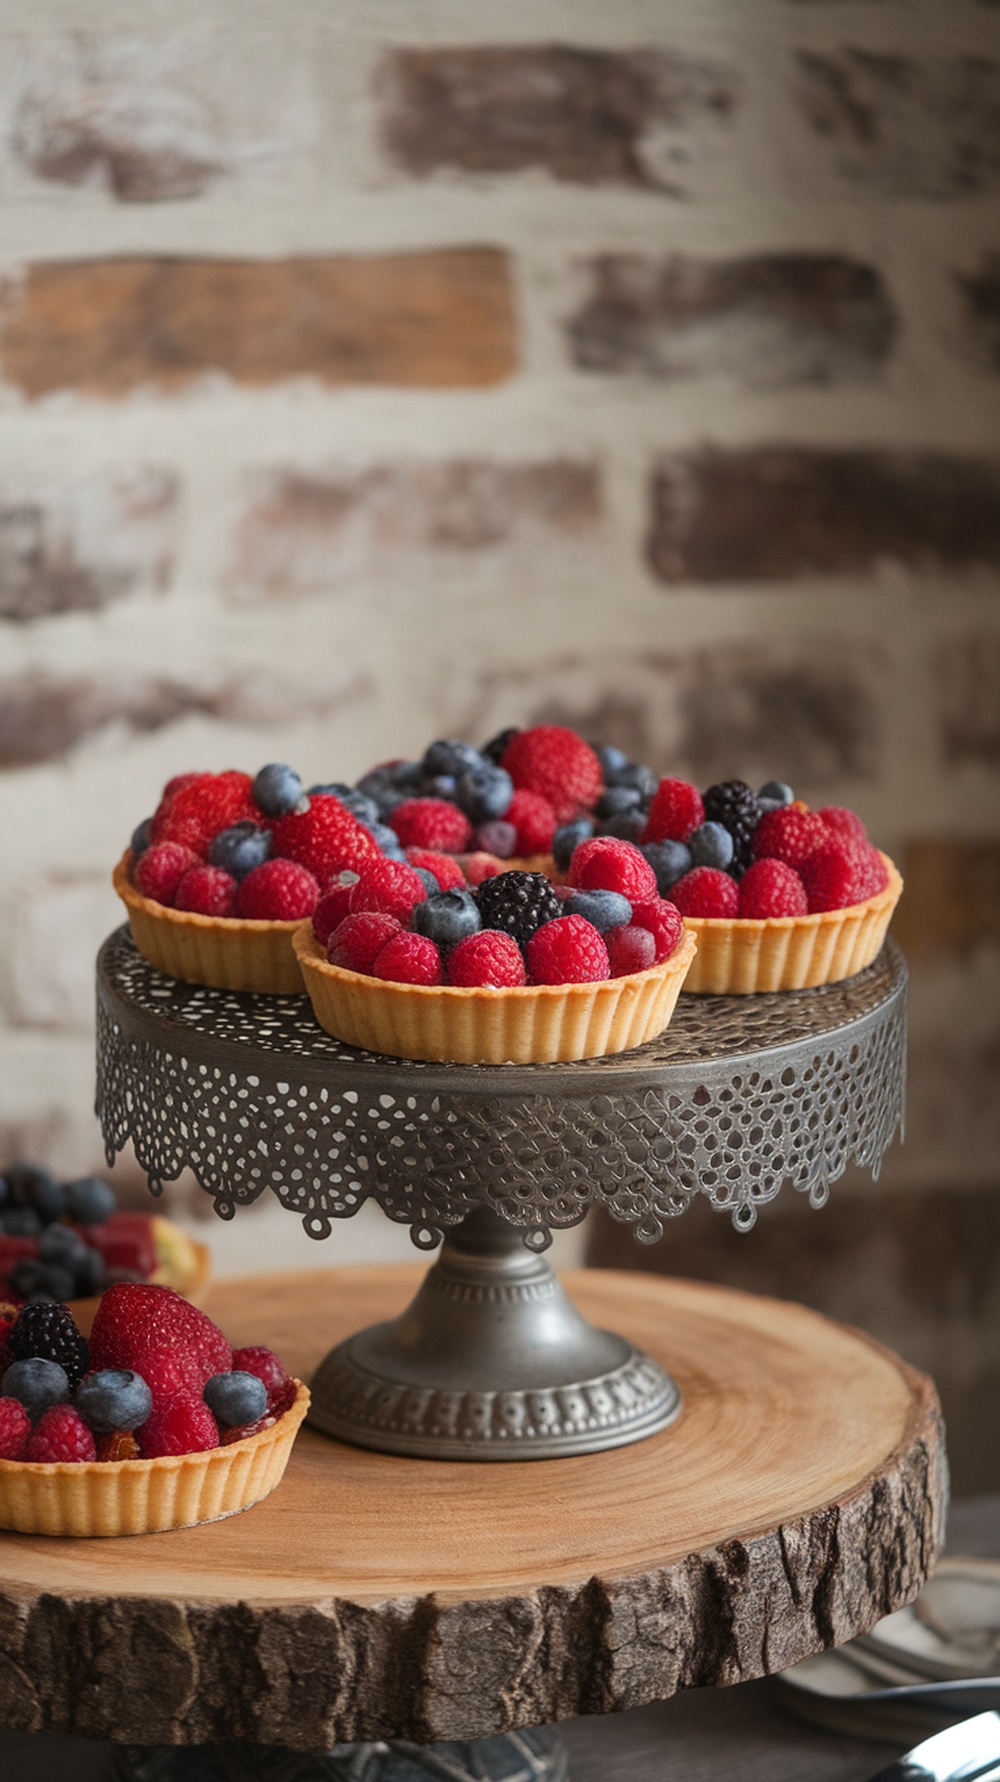
Fruit tarts are a delightful treat, perfect for any baby shower. These mini desserts feature a crisp pastry shell filled with a creamy custard or pastry cream, topped with a colorful array of fresh fruits. The combination of sweet and tart flavors, along with a glossy glaze, makes each bite refreshing and visually appealing.
This recipe is simple to prepare, making it an excellent choice for those new to baking. With just a few key ingredients and some fresh fruit, you can create a stunning dessert that will impress your guests and satisfy their sweet cravings.
Ingredients
- 1 ½ cups all-purpose flour
- ½ cup powdered sugar
- ½ cup unsalted butter, softened
- 1 large egg yolk
- 2 cups pastry cream
- 1 cup mixed fresh berries (strawberries, blueberries, raspberries)
- ¼ cup apricot jam
- 1 tablespoon water
Instructions
- Make the Tart Shell: In a mixing bowl, combine flour and powdered sugar. Cut in the softened butter until crumbly. Add the egg yolk and mix until a dough forms. Press the dough into tartlet pans and chill for 30 minutes.
- Bake the Shells: Preheat the oven to 350°F (175°C). Bake the tart shells for 15-20 minutes until golden. Let them cool completely.
- Prepare the Filling: While the shells are cooling, prepare the pastry cream according to your favorite recipe or use store-bought. Fill the cooled tart shells with the pastry cream.
- Top with Fruit: Arrange the mixed fresh berries on top of the pastry cream in each tart shell.
- Make the Glaze: In a small saucepan, heat the apricot jam and water over low heat until melted. Brush the glaze over the fruit to give it a shiny finish.
- Serve: Chill the tarts for 30 minutes before serving, then enjoy your beautiful fruit tarts!


Leave a Reply